Chapter 2 ~ Modern Learning
⬆ Shiftrefresh Shift-Refresh this page to see the most up-to-date instructions.
In the previous chapter, you modified your personal computer's features (its internal workings, if you will). In this chapter, you'll focus on your external computing...how you interact with browser-specific features and with other humans.
← This Week's Objectives, listed at the left, walk you through the steps to improve note-taking, reference tracking, read about modern learning methods and the job market, as well as improve the Email messaging experience.
For discussion, you'll improve and document your research skills and reply to at least one classmate with more research about their topic.
This chapter's skills and discussion will take between 4 and 12 hours to complete.
2.1 Improve note-taking with note-taking applications.
Carolina Kuepper-Tetzel wrote in New Findings Inform the Laptop versus Longhand Note-Taking Debate (2020) that several studies of college students taking notes by hand or typing (or not at all) had mixed results on retention of facts and concepts. Either method did not seem to change students' overall success on tests given soon after or days later. Note-taking is helpful as a study aid after class, to help refresh the memory for test-taking or adhering to instructions. In this course, however, you'll learn to use a note-taking application to improve your research tracking.
 In addition to note-taking for courses, how else can you use such an application?
How do businesses use them?
Here are some common uses in the workplace:
In addition to note-taking for courses, how else can you use such an application?
How do businesses use them?
Here are some common uses in the workplace:
- Onboarding procedures for new employees.
- Media planning during an in-person or remote team meeting.
- Pitching an idea.
- Designing a product, mood-board style.
- As an organizational chart.
- Planning a dissertation or keynote address.
A broad range of users who have differing cognitive styles, or ways of approaching/solving problems, will take notes differently. These differences dictate how they use note-taking software to track and react to the varying ideas.
Experiment with each application that you have access to:
- Microsoft OneDrive and OneNote are best for Business majors, graduate students, and most office workers.
- Box Drive and Notes are widely used in business and educational settings.
- Google Drive and Keep are widely used in business and educational settings.
- Apple iCloud and Notes are widely used in creative businesses.
Experimenting will help you choose one that works best for your style of learning, tracking, and collaborating.
As you complete the upcoming research for discussion, use the note-taking application of your choice to capture journal/news articles, movies, diagrams, and charts that you find.
- Microsoft OneNote
- Sign into OneNote in three different ways: OSU OneDrive, OneNote.com, or launch OneNote from your desktop (if you have it installed). Sign in with your OSU ONID credentials. Choose to allow (or not) notifications via your computer's desktop.
- If you are logged into your OSU OneDrive/Sharepoint drive, then you'll notice that OneNote recognizes you as an affiliate of OSU.
- Choose New to create a notebook with the CS 101 name and orange (or other color). Click Create to save the notebook to your cloud drive for access via different devices.
- Right-click to rename the first Section to Chapter 2 and name the Page
Research for discussion.

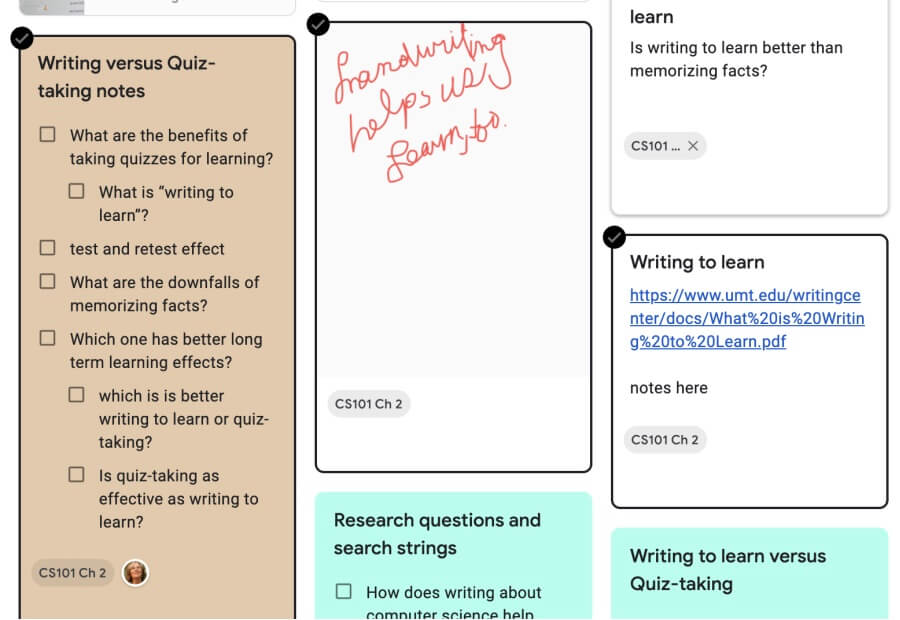
- Experiment:
- Write notes and change a list of tasks into a checklist using the ☑ function.

- Use Tags to highlight different kinds of content with different styles and symbols.

- Hyperlink articles found online using the usual keystroke.
- Insert Pictures from the Web.


- Insert an audio recording or dictate to write.

- Draw concepts or write notes with a stylis or finger.
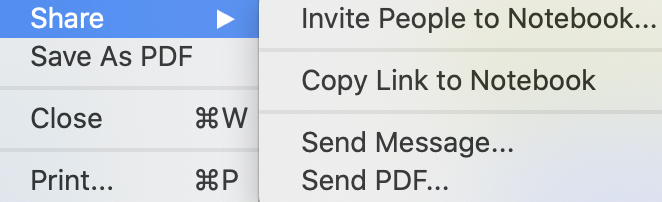
- Share the list via email or save it as a PDF file.
- Install the
OneNote Clipper extension in Chrome. This quick-add button will speed up the saving of sources to your labels and
eliminates the need for bookmarking.
- Login with your OSU account. Accept permissions.
- Locate an article in the browser and click the new Clipper icon on the Extensions bar.
 Notice how all of the text of the article is displayed in the popup window!
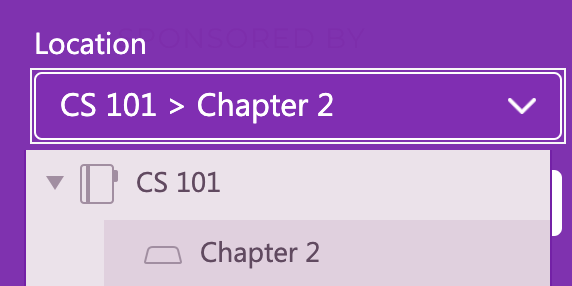
 - Choose your CS 101 notebook as the location and click Clip to save it.
- Navigate back to the OneNote to see the new article listed in the section.

- Install the OneNote phone application if you have a smartphone. Use the app to capture news, images, files, and other sources for this and other courses. In addition, use it for personal reminders, grocery, gift, and bucket lists. Sections, pages, and other media that you add there will show up in the cloud so you can view it from all your devices.
- Write notes and change a list of tasks into a checklist using the ☑ function.
- Apple Notes
As noted in the syllabus and the previous chapter, Apple products are not supported for this course. However, Apple Notes is a powerful tool that allows you to share your ideas between phones, laptops, and desktops.
I recommend this June 2020 article by Ryan Christofell of MacRumors to get you started.: Everything Changing in Apple Notes and Reminders in iOS and iPadOS 14.
> Accounts to add your OSU and personal Google accounts.
The local and iCloud version of Notes provides many more options that a note connected to your Google accounts. to fully experiment, use your iCloud section of the Sidebar.
Experiment:- Write notes and start a checklist of tasks ☑ function.
- Insert Pictures by dragging them to the Note.
- Dictate to write notes using fnfn.
- Draw concepts or write notes with a stylis or finger from an iPad or iPhone.
- Share the list via email or > Export as a PDF.

Access your personal iCloud account to see and edit the Notes saved there. Notes will sync between the two, as well as between your iPhone if you use one. Apple Notes comes installed on iPhones.
- Google Keep
- Login to your OSU Google Account.
- Launch Keep.Google.com using the Chrome browser on your computer.
- Experiment:
- Take a Note and turn it into a list using the Checkbox function.
- Add Labels. Make one for this course and chapter: CS 101 Chapter 2. Make another one for next week's chapter or for another course.
- Capture images. Also capture the URL for the site that published the image, rather than the Google Images URL.
- Share the list with a friend, groupmate, or one of your other accounts.
- Draw and hand-write a note.
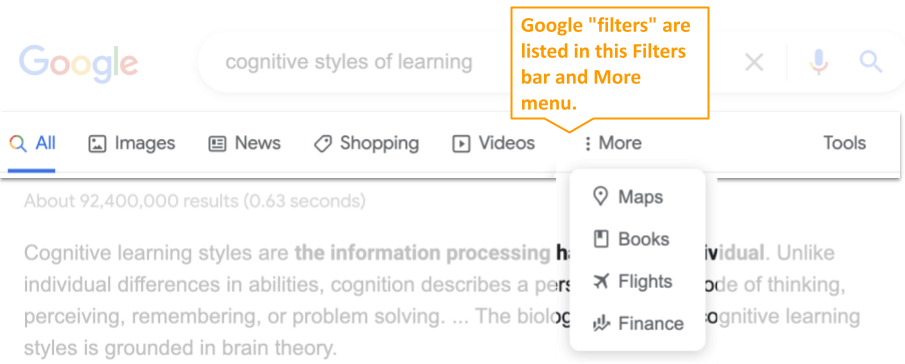
- Click the top left corner of each card you created for the CS 101 label, click the 3-dot More menu, and Copy to Google Docs. This allows you to revise your notes into a more complete essay and check spelling and grammar.
- Right-click > open in a new tab to view this diagram in a larger size:

- Install the
Keep extension in Chrome. This quick-add button will speed up the saving of sources to your Keep labels and
eliminates the need for bookmarking.
- Locate an article in the browser and click the new Keep icon on the Extensions bar.
- Choose your CS 101 label as the location. Saving is done automatically.
- Navigate back to the Keep application to see the new article listed in the CS 101 set of cards.
- Locate an article in the browser and click the new Keep icon on the Extensions bar.
- Install the Keep phone application if you have a smartphone. Use the app to capture news, images, files, and other sources for this and other courses using your OSU account. Easily switch to your personal Google account to use the app for personal reminders, grocery, gift, and bucket lists. Labels and cards will show up in the cloud so you can view it from all your devices.
- Box Notes
Login to your OSU Box account and click on the Notes icon.
Click the New button and title the new note to reflect chapter 2 notes.
Experiment:- Write notes about this chapter's topics.
- Start a checklist of tasks ☑ function.
- Hyperlink by dragging a website article's title from the browser to the note.
- Hyperlink by clicking the popup hyperlink icon.
- Insert Pictures by dragging them to the Notes as well as by using the Upload icon.
- Dictate to write notes using fnfn or other dictation app/extension.
- Unfortunately, Drawing tools are not built in.
- Chat to leave notes for collaborators.
- Share the list with yourself via email or ... > Print to a PDF file.

If you are able, install the Box Notes application on your computer's hard drive to work without internet and to always have your Notes synced when you do have internet.
In addition, install the Box phone application if you have a smartphone. Use the app to capture news, images, files, and other sources for this and other courses. In addition, use it for personal reminders, grocery, gift, and bucket lists. Sections, pages, and other media that you add there will show up in the cloud so you can view it from all your devices.
2.2 Choose a Bibliography tool.
Keeping research notes and formal bibliographic information in the same location would be handy. Unfortunately, the note-taking apps you explored above don't spit out ALA, MLA, or IEEE bibliography entries, which are needed for college essays.
To supplement note-taking about sources, choose one of the Bibliography applications (below) to capture the metadata of the required readings as well as your research sources so that you can make a formal bibliography list later.
Bibliography tools
The following bibliographic tools will help you track and properly cite articles, images, and movies to use in each of the assignments. If you already use a tool you like, then you don't need to set up another one.
If you have never tracked sources with an app, you are required to try one of the following options. It will save you a lot of time!
Using an app will also keep your computer from crashing due to too many browser tabs being active simultaneously.
Choose one to set up:
- articleGoogle Docs
- Microsoft Word
-
 Chrome extension
 -
 For Windows or Google
 -
 For MS Office
 -
 For MS Office
 -
 Online tool
 -
 Online tool
It doesn't matter which style you use for each bibliography (IEEE, MLA, APA, etc.) but each one must include: author last name, author first name, title, publisher, publication date, page number (optional), and the URL. Here is an example:
Desjardins, Jeff. "The Extraordinary Raw Materials In An Iphone 6S". Visual Capitalist. 2016. https://www.visualcapitalist.com/extraordinary-raw-materials-iphone-6s/.
Tips
- If a source does not have an author, use the title.
- If a source lacks a date, use the copyright date of the web page or publication (usually found in the footer).
- If a source is not online, then a URL is not required.
2.3 Synthesize Modern learning.
Hover over the highlighted concepts to learn their meanings.
This discussion will require that you read and
synthesize
writing from multiple sources,
rather than simply
summarize
what you learned from a single article.
Scroll through the following article to read it and choose three of its original sources to read further. Then, in the first paragraph, synthesize in the third-person style what you learned about three modern learning methods noted in this article:
- Modern Learning
- Elaborate on three of the articles/methods that are mentioned in the article.
- Select the names of key concepts (not phrases, quotes, or minor words) and apply the Bold style.
- Cite by hyperlinking the titles of the three articles you are referring to in a sentence in the paragraph.
- Use the bibliography tool to generate a bibliography entry. Add it to your notes.
2.4 Summarize job skills.
Most students, upon finishing their degree, will seek employment to improve their lifestyle. When the pandemic of 2020/22 hit the world, employers were forced to change the way they manage their workers. They quickly saw, too, that many jobs could be done quite well remotely. And, in turn, many workers felt that working in an office all week was not as productive or as necessary as working from home (or a tent in the woods, or a cabana on the beach!). So, the struggle for employers to find quality workers at an affordable wage changed their requirements. If you've recently hunted for a job, you might notice that the skill set is described differently, the pay is higher, and the perks are related to work-life balance.
Scroll through the following article to read it. Then, in the second paragraph, summarize in the third-person style what you learned about your favorite top three of the 20 skills needed in the workplace.
- 20 Skills in Demand in Today's Workforce
- Select important keywords and apply the Bold style.
- Use the bibliography tool to generate a bibliography entry. Add it to your notes.
2.5 Update your email settings.
Appearing more professional while trying to enjoy communications within your email program is a common task whether you are a student or an employee. Use the following steps to improve the design of your Inbox as well as the design of your messages:
2.5.1 Enable Notifications and key Settings
Click the settings button in Gmail to reveal the Quick Settings menu. Ignore it for now and click See all settings to make these adjustments:
- Outlook
- Gmail
- Enable the Send → Archive button so that when you're done with a conversation, you can archive it, which hides it from your Inbox (reduces clutter).

- Customize the Default Text Style used to compose messages. Choose a font and size that fits your personality
and helps others read the message without causing eye fatigue. This example uses Large Georgia font:

What font gives you a voice?
Note that the default font is either Roboto, Arial, or Helvetica, which is chosen by your computer. Choose some other option from the list. - Enable the Ask before displaying feature, so images are only downloaded when you allow it.
This helps reduce the downloading of unecessary and sometimes malicious files.

- Enable Spelling and Grammar Suggestions to see visual cues where editing is needed.

- Enable just the number and color of Stars needed to visually organize important messages.
A simple method is to use:
yellow for respond later,
another color for respond soon,
and a red exclamation point for respond immediately.

- Enable Desktop Notifications on so that you'll be notified when the Instructor (or Canvas) writes to you.

- Click the Save Changes button at the bottom of the General Settings screen (scroll way down the page).
- Enable the Send → Archive button so that when you're done with a conversation, you can archive it, which hides it from your Inbox (reduces clutter).
2.5.2 Design a Signature
An email signature allows you to include your contact information at the bottom of every message without having to type it over and over. Design a signature for your OSU account, then, if you like, add another signature for personal messages.
Note that you'll add an emoji instead of a photo or logo...because multiple downloads of the same image in a long thread increases scrolling and processing time.
First, choose an emoji to represent you or your interests.
- From the EmojiCopy website, browse a category or search for an emoji.

- Choose a skin tone if you like.
- Choose a view size (Large or Huge is helpful) and choose the Native rendering option.
- Click to copy an emoji that you like.
Then, modify your email signature to include the emoji:
- Outlook
- In Outlook's downloadable app on your hard drive, click the New Message button. If you are using the browser version of Outlook, then you'll click on New Mail then Insert > Signature.
- Click the Signature icon and choose Signatures...

- Click the +New signature link and name the signature "OSU Formal".
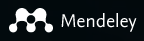
- On the first line inside the editing box, type your first and last name, title, and email address. Add a phone number if you like. Separate each item with a vertical bar |.
- On the second line, type your program department name, college, and university.
- Select the text and change the font, color, and size so it is not the default (be creative).
-
Paste the emoji in front of your name in the Signature editing box.
Select the emoji and set it to at least size 26, so it can easily be perceived. - Keep the signature to 2 lines of text to save space (so that threaded messages aren't so loonngg). The screenshot above has 2 lines of text with the second one wrapping to the next line when in viewed on a smaller window.
- Add a hyperlink of your email address to your name. Choose the link to: Email address button. In addition, add hyperlinks to your department/program name, college name, and university. This requires you to navigate to those websites, copy the correct address, and come back to the signature to add the hyperlink.
- Select the new signature name from the For New Messages and For Replies/Forwards Lists.

- Click the Save button at the bottom.
-
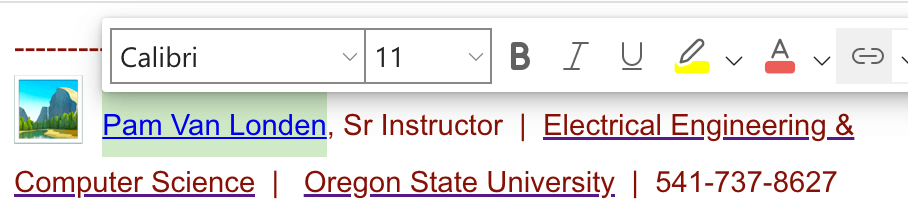
- From the settingsSettings > General > Signature section, click the + Create New button and give your signature a name, such as OSU professional.
- On the first line inside the editing box, type your first and last name, title, and email address. Add a phone number if you like. Separate each item with a vertical bar |.
- On the second line, type your program department name, college, and university.
- Select the text and change the font, color, and size so it is not the default (be creative).
-
Paste the emoji in front of your name in the Signature editing box, like this:

Select the emoji and set it to size HUGE. - Keep the signature to 2 lines of text to save space (so that threaded messages aren't so loonngg). The screenshot above has 2 lines of text with the second one wrapping to the next line when in viewed on a smaller window.
- Add a hyperlink of your email address to your name. Choose the link to: Email address button. In addition, add hyperlinks to your department/program name, college name, and university. This requires you to navigate to those websites, copy the correct address, and come back to the signature to add the hyperlink. The email address should automatically hyperlink itself.
- Select the new signature name from the For New Emails Use and On Reply/Forward Use Lists.

- Click the Save Changes button at the bottom of the Settings > General screen.
Send yourself an email message to see how the signature looks.
The emoji may change depending on the window sizes, browser, and platform.

Edit your signature if it spans more than two lines by rearranging the hyperlinks, so it looks like this ↑, rather than this ↓:
2.5.3 Use Smart Subjects
To ensure your messages don't look like spam, include a smart subject, such as the name of the course, a due date, or some other critical detail. A smart subject uses [ and ] around the first part of the subject. When you write to your instructors, it is wise to include the course number in the subject, so it is obvious. They won't always remember who is in which course. If for some reason, you are unable to write to the Instructor of this course via Canvas, as instructed, then use a smart subject via Gmail or Outlook.

2.5.4 Update the Inbox theme
Because professionals spend a lot of time viewing email, it is fun to improve the environment. If you like, choose an existing theme or add your own photo to the background of the Inbox. Blur the background if the photo reduces readability of messages. Or, revise font choices so they are legible on top of your photo. Go to Settings > See all settings > Themes. Choose a photo from Pick your theme. Adjust the amount of blurring (a busy, high-contrast background behind text is hard on the eyes). Save the theme to see it when using the Inbox.

This step won't be scored, so if you are short on time, move onto the next step.
2.6 Create a formal message.

So you can demonstrate that you've completed the important steps above, you'll draft a new message that shows your new fonts and writing as well as your new signature.
This lesson cannot be completed using the Gmail app on a phone; it must be completed using Gmail from the Chrome browser, or the Outlook app on your computer.
Do not send the draft message to the Instructor!
- Click the + button in Gmail, or the New Mail button in Outlook to generate a new message.
- In the subject field, type a Smart Subject that says [CS 101 Ch 2] Assignment.
- In the first line of the main message, above your automatic signature, type a professional salutation and short introduction. Address your message to the instructor Ms. Van Londen and state what is included in the message.
- Copy the two paragraphs you wrote about Modern Learning and Job Skills then use CntlShiftv to paste them into your Gmail or Outlook message (pastes without copying the formatting). Add back in the hyperlinks and bolded key concepts (names; not phrases) if they disappeared. The paragraphs in the message (not counting the signature or bibliography) should match your new default message font, font size, and styles.
- Paste in the list of sources you captured using the Bibliography tool.
Remember, each entry must include the author, title, publish date, publisher, and URL.
Each entry should be in a single paragraph (don't make a paragraph break before the URL, for example).
Select them then apply the numbering icon.
If the bibliography is more than three sources long, select the list and reduce its size.
- Finish with a valediction just above the signature.
- From the 3-dot more menu on the bottom right corner of the message screen,
choose Check Spelling then make corrections.
- To print the page to a PDF file, use this method:
- Outlook
- Send the message to yourself.
- In that sent message, click the 🖨️Print icon.
- In the resulting screen, click the 🖨️Print icon.
- Copy the resulting PDF file to your OneDrive's CS 101 folder (so you have a backup).
- You do not need to "share" the file with us this week. Only share the URL if you need our help.
- Gmail
- From the 3-dot more menu choose Print. If all the components are rendering properly in the print view, then print the file as a PDF to your hard drive. Print in vertical/portrait format.
- If the signature's emoji did not render when printed, then take a look at the file in your phone's Gmail app.
- Print the file to your phone's internal storage. The emoji should render in that PDF file.
- From the 3-dot more menu of your phone's internal storage, choose Send File to your Google Drive's CS 101 folder.
- Copy the PDF file to your Google Drive's CS 101 folder (so you have a backup).
- Outlook
Complete a few more steps before submitting the PDF file.
2.7 Ask for help.
Stuck on a specific step? Share your file with the instructor.
In order for the instructor and TAs to see your progress without having to download or ask for account permission, provide a correctly-set sharing URL so they can look at it live. Follow the most appropriate instructions below.
Paste the sharing URL into the Canvas Inbox message or Assignment Comment box, along with your questions. Note which step number you're stuck on.
Share Microsoft Office files from the OSU OneDrive cloud drive and share Google Suite files from the OSU Google cloud drive:
- Windows or Microsoft Account
- Login to your OSU OneDrive account from the browser.
- Drag the file from your hard drive to the OSU OneDrive file list in the browser to transfer it there.
- Beside the file name in the list, click the
 Share icon:
- Choose the settings provided in the screenshot below:

- Copy the link so you can provide it to the instructor or in the Assignment Comment box.


- Google Account
- With your file open, click the Sharing button at the top right of the screen. Or, if the file is not open but listed in the Drive, right-click it to choose the Share menu.
- Click the Get Link box to update the OSU Settings and copy the link:

- Ignore the Share with People and Groups box for this course.

Paste the URL into the Canvas Inbox message or Assignment Comment box, along with your questions. Note which step number you're stuck on.
2.8 Verify your work.

From the Canvas Home tab, click the Ch 2 ~ Modern Learning assignment. Scroll to the bottom to see the Rubric. Compare your work to the Rubric to ensure you've included all paragraphs and materials. The rubric is based on the following scoring criteria, which are based on the instructions above: Check off each criterion to confirm you've completed them before submitting the file.
If using Google Docs, check the Add-on > TurnItIn Draft Coach > Similarity tab to view and edit any plagiarized writing. Review how to use TurnItIn.
- Message is free of plagiarism.
- Message was submitted as a vertical PDF file (rather than sent via Gmail/Outlook, or printed horizontally).
- Message includes a smart subject.
- Message font and font styles have been updated (so that all paragraphs and list use the same font, font-color, and size).
- Message's first paragraph synthesizes and cites the 3 or more modern learning methods. Key concept names are bolded.
- Message's second paragraph summarizes 3 in-demand job skills. Key concept names are bolded.
- Message includes a numbered list of bibliography entries (four or more entries).
- Message signature at the bottom includes an emoji, name, department, other contact information along with a hyperlink, and font changes.
- Message uses proper grammar and spelling.
2.9 Submit the file.
Each assignment must be submitted before the Due date and time as specified on the Canvas Home tab. The Available Until date and time constitutes a grace period, which can be used in an emergency, or if you are ill (it cannot be used for every assignment). Students who submit using the Available Until date may incur score reduction. Students on a DAS Flexibility Contract: there is no need to notify the instructor. All of your Available Until dates will be set to 72 hours past the Due Date, which can be used up to 3 times. Abuse of the Flexibility Contract will be reported to DAS.
- Click on the Canvas Home button and scroll down to the chapter assignment. Click the assignment link.
- Upload the PDF file. Confirm that it uploaded.
 Check the TurnItIn Report for plagiarized phrases and sentences.
Review how to use TurnItIn.
Edit or add quote marks in your original file to ensure the second draft of the file will pass the TurnItIn inspection.
Resave the PDF file.
Upload the newer version in the assignment's Submission Details screen.
Check the TurnItIn Report for plagiarized phrases and sentences.
Review how to use TurnItIn.
Edit or add quote marks in your original file to ensure the second draft of the file will pass the TurnItIn inspection.
Resave the PDF file.
Upload the newer version in the assignment's Submission Details screen.
- Within 3 days of submission, be on the lookout for Rubric feedback and Comments from the TA and Instructor.
- Ask questions about the score and feedback in the assignment's Commenting box.