Chapter 1 ~ Tools and Introductions
⬆ Shiftrefresh Shift-Refresh this page to see the most up-to-date instructions.
You are ready to begin working on graded assignments if you completed the following:
- Read and understood the Home page skills, such as how to use this textbook.
- Read the Syllabus and took the Canvas Home > Syllabus Quiz.
- Completed the Explore Canvas activities and took the Canvas Home > Canvas Quiz.
This chapter's skills and discussion will take between 4 and 12 hours to complete.
Due dates are listed in the Canvas course Home page, Assignment list, Coming Up list, and Calendar.
⬆ Shiftrefresh Shift-Refresh this page to see the most up-to-date instructions.
Print these instructions.
The following procedure has many steps, which are perhaps easier to follow when you print and check them off as you go. Hide/close + the previous section to avoid printing too many pages.
1.1 Connect to OSU's new Virtual Private Network (VPN).
OSU no longer requires/recommends Virtual Private Network (VPN) when using a public wi-fi connection to access Canvas. However, to access some materials, you might need to connect using VPN.
This is not a graded activity, so skip it if you won't need it.
Read about why you might need it, then direct all technical difficulties to the OSU Service Desk.
- VPN Setup for Windows
- VPN Setup for Mac
- VPN Setup for Linux
- VPN Setup for Android and Chromebook
- VPN Setup for iPhone, iPad
1.2 Add a course folder in Documents.
For this course, you may not save files to the Desktop/Finder because they get stored in the Random Access Memory (RAM) instead of a more efficient area of the hard drive, which is called the Documents folder. Freeing up RAM will help ensure fast and efficient processing. Also, Desktop/Finder folders might not get included in automatic backups.
- Windows
Click on the Documents folder of your computer's hard drive, then click the yellow Folder icon at the top of the Explorer window. Another way to make a folder is to right-click on Documents > New > New Folder. And other way is to use the keystroke CtrlShiftn. Rename the folder CS 101. Christopher Wade creates a new folder on the Windows platform. (2020)
Add folders for other courses, if you haven't already. - MacOS
Inside the Documents folder of your computer's hard drive, right-click to add a folder and name it CS 101.
Add folders for other courses, if you haven't already. - Chromebook
A Chromebook's connection to a Google Drive is automatic when signing in with Google credentials. To login with your OSU credentials in addition to your personal account's credentials:- Logout of your personal account.
- Login with your OSU credentials.
- Click the Time button on the lower right corner of the screen.
- Click your profile picture.
- Click Sign in another user.
- Sign in to your personal Google account.
Right-click on the My Files icon of your Chromebook's hard drive. Choose New Folder and name it CS 101.
Add folders for other courses, if you haven't already, using CtrlE.
1.3 Update your operating system (OS) settings.
To learn more about your computer's operating system and system preferences, explore these features to ensure you are set up for success:
Set automatic software updates.
- Windows
- From the menu, choose Settings then Update & security.

- Click Windows Update.


- Update the Change active hours options to correlate with your working hours.

- Update the Restart options to correlate with your preferred system restart time.

- From the menu, choose Settings then Update & security.
- MacOS
- From the menu, choose System Preferences.
- Click Software Update.
- Check the box for Automatically keep my Mac up to date.

- Chromebook
- From the menu,
click the settingsSettings icon.

- Choose Safety Check.

- If updates to the Chrome browser and/or Chromebook are available, then click the Update button.
- Restart the computer when prompted.
- From the menu,
click the settingsSettings icon.
- Windows
Modify the Folder and File view settings.
- Windows
- From the menu, choose File Explorer.

- From the File Explorer > tab, choose Details.
This will allow you to see more files at a glance and sort by name, date, or type.

- From the File Explorer > View tab, check the box for File name extensions
to show which file format a file is saved in.

- In Windows 10, use the + tab to add a new tab so you can view multiple folders in one window, just like in a browser.
- From the menu, choose File Explorer.
- MacOS
- Click on the Finder.
- From the menu, choose Preferences.

- From the Preferences > General tab, choose whether you want new folders to open in tabs or new windows.
- From the Preferences > Advanced tab, check the box for Show all filename extensions.

- From the Finder > menu, choose Show View Options.

Adjust stack, sort, icon size, grid space, text size, and label position to improve your readability preferences.
- Right-click on the toolbar at the top of any Finder window.
Choose Customize Toolbar.
 Drag the New Folder icon to the toolbar at the top.
Add or remove any other features from the custom toolbar as needed.
Drag the New Folder icon to the toolbar at the top.
Add or remove any other features from the custom toolbar as needed.
 Click Done.
View the finished toolbar to ensure you have all the features you need handy.
Click Done.
View the finished toolbar to ensure you have all the features you need handy.
- Chromebook
From the Document Viewer, click the grid or list icon on the top right to view the files differently. View by list then sort by name and then by date.


- Windows
Add application, servers, and folder aliases to the Start/Tiles, Taskbar/Dock/Launcher, and Sidebar menus.
- Windows
- From the menu, choose Settings then Personalization.

- From the Personalization menu, choose the Start Tiles option.

Turn on the File Explorer, Documents, and Downloads windows. Click on Choose which folders appear on start to turn these on.
- From the menu, locate each application you typically use and right-click to Pin to Start tiles.
- Do the same for the Taskbar, so that even with other applications open,
you can launch another app without hiding the screen.

- From a File Explorer window, right-click on the CS 101 folder and choose Pin to Quick Access menu.

- From the menu, choose Settings then Personalization.
- MacOS
- From the menu > Preferences > General tab,
click these selections:
hard disks, external disks, and connected servers.
Also, set the to show the folder.

- From the Applications folder,
drag the icons for your favorite applications onto the Dock.
If your system won't allow you to do that for some apps, then
right-click on the application icon to make an alias.
Drag the Alias to the Dock.
 Drag the Docked icons around to order them by type or most used.
- To speed up accessing your most used folders, drag them from the list of folders in a Finder window
to the Finder Sidebar.

- From the menu > Preferences > General tab,
click these selections:
hard disks, external disks, and connected servers.
Also, set the to show the folder.
- Chromebook
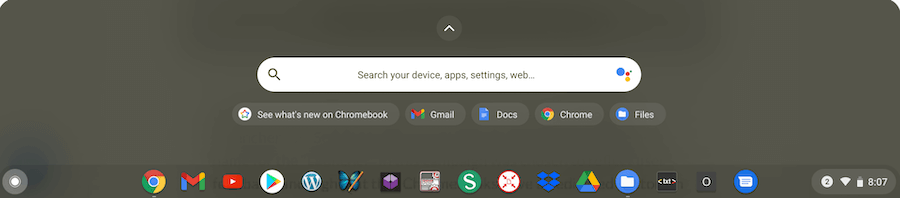
As you open applications, pin them to the Shelf at the bottom of your screen.
Then, click and drag those pinned icons so they are in your preferred order. Click the Launcher icon at the left to view other apps.
 Drag the launcher up to see other apps and extensions you have installed.
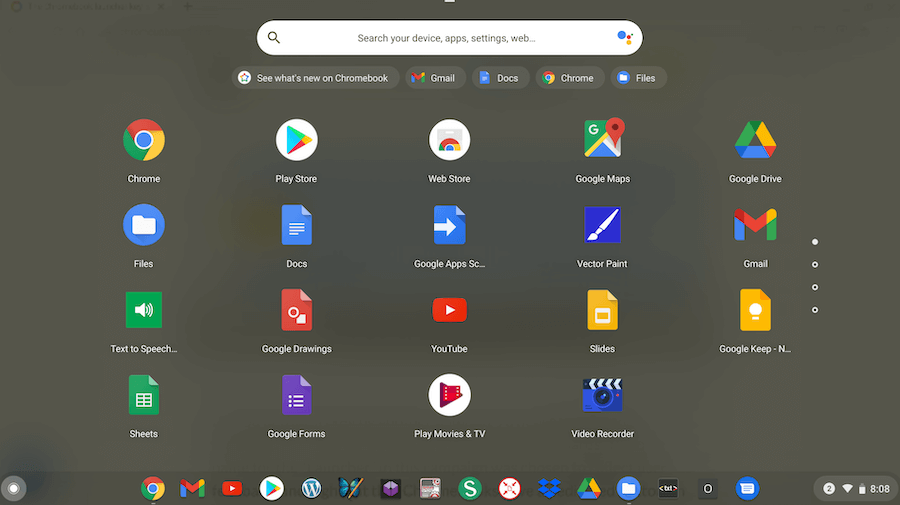 Locate other apps via the Google Play Store.
- Windows
Empty the Cache, Downloads folder, and Trash:
To speed up your computer's operating system and reclaim hard drive space, periodically clean out the cache of temporary files, empty the Downloads folder, and empty the trash. A cache of temporary files will build up when watching movies/TV, listening to podcasts, and installing/removing applications. These temp files don't get deleted automatically when you remove a movie or app, so periodically remove them to free up space. Try it now:- Windows
- From the menu, search for Disk Cleanup. After launching Disk Cleanup, choose the C: drive and check Temporary Files. Click the Clean up system files button.
- Open a File Explorer window's Quick Access menu, click on the Downloads folder.
Click into the list of files and CtrlA to select all the files.
Right-click and choose Delete.

- Right-click on the Recycle Bin and
choose Empty Recycle Bin.

- MacOS
- From the menu, choose About this Mac.
Click the tab and wait for the colored bars to load.
They will show the kinds of files are taking up most of the room on your hard drive.

Click the Manage button and from the Recommendations options.

Use the Reduce Clutter option to remove large unnecessary files, downloads, and unsupported applications.
Use the Optimize option to remove movies/TV shows you won't be watching again.
Adjust the Trash settings to automatically empty the Trash after 30 days.
- If you didn't empty the Downloads folder in the Reduce Clutter area, then
do it from a Finder window. Click on the Downloads folder,
use CommandA to select all the files there,
then click the Trash button on the taskbar at the top of the Finder window.

- Empty the Trash now, by right-clicking on the Trash bin on the Dock and choosing Empty Trash.
Confirm your choice.


- From the menu, choose About this Mac.
Click the tab and wait for the colored bars to load.
They will show the kinds of files are taking up most of the room on your hard drive.
- Chromebook
After making folders for different courses and topics, move files from your folder into the new folders, as needed. Select and right-click to delete all other files you no longer need.
Most Chromebooks do not have a trash can. Files that are deleted are no longer accessible.
Files stored on your Google Drive, however, can be deleted manually. The deleted files directory is set to remove them permanently every 30 days. Learn more: Delete and restore files in Google Drive. and Manage files in your Google Drive storage.
- Windows
1.4 Login to OSU cloud drives: Google, Microsoft, and Box.
OSU, as well as many other businesses that you might work for in the future, use cloud applications and file storage to increase ease of sharing among devices and teams.
1.4.1 Why use three drives?
- OSU G Suite drive. This cloud drive will allow you to share Google Application files with the Instructor as well as download copies to your computer's hard drive so you have two copies.
- OSU OneDrive drive. This cloud drive will allow you to login with your OSU credentials and upload/backup copies of your Microsoft Office files, as well as share them with the instructor.
- OSU Box drive. This cloud drive will allow you to upload copies of any file so you have two copies.
Apple iCloud drives are not supported by OSU or this course.
Use your OSU credentials (ONID email/userID and password) to login to the drives listed below then add a folder called CS 101 to each:
1.4.2 Google Drive
Make a CS 101 folder on your OSU Google Drive in the My Drives area.- Login to drive.google.com with your OSU ONID username and password.
- + > New Folder.
- Name the folder CS 101.
1.4.3 Microsoft Drive
Make a CS 101 folder on your OSU Microsoft Drive.- Sign in to onedrive.com with your OSU ONID username and password.
- New > Folder.
- Name the folder CS 101.
1.4.4 Box Drive
Make a CS 101 folder on your OSU Box Drive.- Login to Box.com with your OSU ONID username and password.
- New > Folder.
- Name the folder CS 101.
1.4.5 Manage multiple cloud accounts with private browsing.
To avoid sign-in conflicts with multiple OSU and personal cloud accounts, experts recommend that you login to personal accounts using a private or incognito browser window and login to OSU cloud accounts with a regular browser window to ensure all login sessions stay intact.
One of the main reasons to work in private browsing mode is to avoid having your search history used for advertising in social media and other sites. It is also helpful when using someone else's computer temporarily. If you are booking travel, the airlines will use your search history to increase prices on subsequent searches, so go incognito!
1.5 Take a cropped screenshot.

Take a horizontal, cropped screenshot of your hard drive and cloud drive folder organization:
- Place a Finder/Explorer window on the left side of your screen.
- In Chrome browser, Ctrlor ⌘n to add a new Window. Move the window to the middle of your screen and navigate to your Google Drive. Display the files in a vertical list if they aren't already. Ensure the new CS 101 folder is visible.
- Ctrlor ⌘n again to add another window. Move the window to the right side of your screen and navigate to your OSU Microsoft OneDrive. Display the files in a vertical list if they aren't already. Ensure the new CS 101 folder is visible.
- Ctrlor ⌘n again to add another window. Move the window to the far right side of your screen and navigate to your OSU Box drive. Display the files in a vertical list if they aren't already. Ensure the new CS 101 folder is visible.
- Use one of the following methods to take a single cropped screenshot of all four windows side-by-side.
There is no need to include other parts of the screen. We want to read the folder names without zooming in. So, that means you must crop close to the four windows, just like the screenshot above.- Windows
Besides using the PrintScreen button on the Windows keyboard, you can use the Snipping Tool for more control. Start → All Programs → Accessories → Snipping Tool
- New → Rectangular Snip to select just the portion of the window and screen you need to show.

- MacOS
Besides using ⌘Shift3 to capture the screen, or ⌘Shift4 to capture a selection of the screen on a Mac, you can use the Preview application to capture, edit, and save the file. Applications → Preview → File → Take Screenshot → From Selection
- Drag the crosshair cursor over the area you want to capture.

- Edit as needed.
- Or, you can use the searchsearch bar on the top right of the Finder to search "screenshot." The screenshot crosshair cursor will pop up automatically. Select the area you want to capture and it will save a file to the Desktop. Edit as needed.
-
Besides using CtrlShift to capture the screen on a Chromebook, you can capture a selection:
- CtrlShift

- Drag the crosshair cursor over the area you want to capture.

- CtrlShift
- Windows
- the file as .png (or .gif for simple imagery and .jpg for more photographic imagery.) Rename the saved file to correlate with the subject of the image, such as cs101-folders-four-drives.png.
1.6 Insert the screenshot into a word processing document.
Besides adding the screenshot, you'll be writing about what you're learning. And, when writing for discussions in this course, you'll want to write at least 150 words per paragraph. In many cases, you'll want to write much more, due to the interesting concepts and events worth explaining.
- Launch a word processor and open a blank page.
- Microsoft Word
> New blank page. - Google Docs
+ > blank page.
- Microsoft Word
- Name the file CS 101 Ch 1 Skills First Last Name and Save the file (if using Word).
- On the first line of the document, type the title: Using my computers and drives, and from the menu, apply the Heading 1 style.

- On the second line, type your first and last name and Chapter 1 and from the menu, apply the Heading 2 style.

- In the first paragraph
write in the first-person style about the modifications you made to your operating system (OS) as per steps 1.1 through 1.4.
Then, change the paragraph style:
- Microsoft Word
- Select the first paragraph.
- Right-click on the paragraph and choose the option.
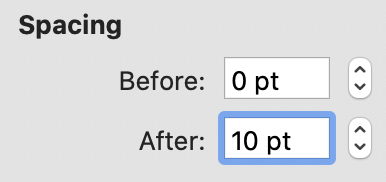
- From the Paragraph screen, change the first-line indent to .25 inches.

- Change the spacing after to 10pt. Click OK.
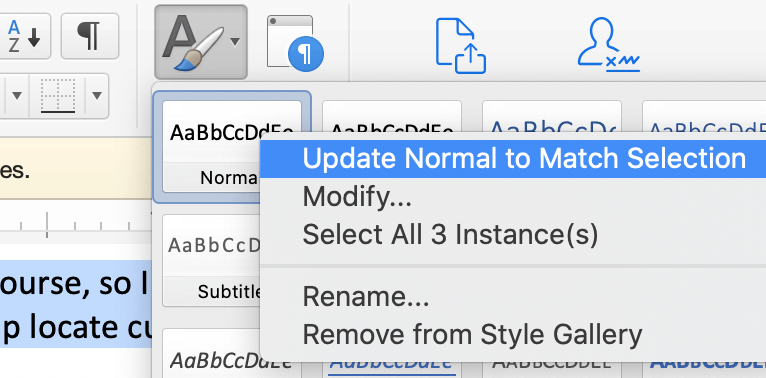
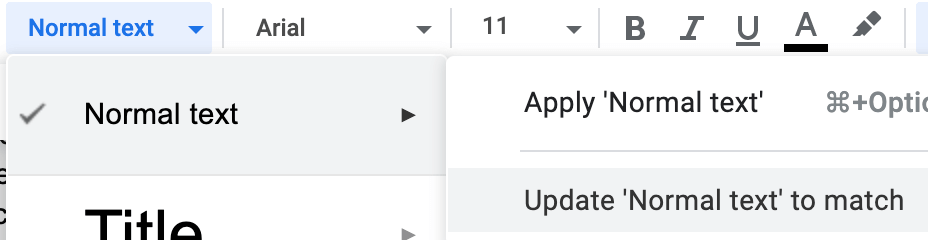
- Click the menu and right-click on the Normal tile.
Choose Update Normal to Match Selection.
- Google Docs
- Select the first paragraph.
- From the menu, apply the Normal style.
- Using the document Ruler, adjust the first-line indent to .25 inches.
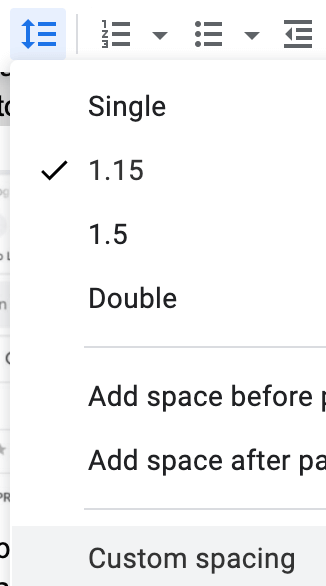
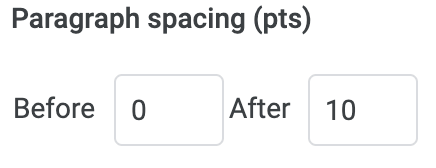
- In the vertical spacing menu, choose the Custom Spacing option and set the space after to 10pt.
- Update the Normal style to match the changes so that all paragraphs now have
indents and space after.
- Microsoft Word
- As you write, apply the Normal style to each new paragraph so it will automatically have an indent and space after.
- Place your cursor after the first paragraph and click the Enter or Return key.
- Insert your screenshot from step 1.5:
- Microsoft Word
From the menu, choose .- Locate the cropped screenshot file on your hard drive.
- Save, then Insert or Upload the image so it displays under the new paragraph.

- Google Docs
From the menu, choose .- Choose Upload from Hard Drive.
- Locate and select the cropped screenshot file on your hard drive.
- Click Open to insert the image file under the new paragraph.

- Microsoft Word
1.7 Use keystrokes and employ ergonomics.
Use the following keystroke diagram and key to help you format and navigate as you write:
Research, write, and format using keystrokes:
- In the second paragraph write in the first-person style about your previous use of keystrokes and the keystrokes you just learned. Apply the Normal style to the paragraph.
- Use the keystroke for Bold to add font weight to all of the keystrokes you mention in this paragraph.
- Use the keystroke for Italic to add italics to the Heading 2 at the top of your document.
- Then, add Bold to the names of concepts in your first paragraph. Continue to add bold to the names of key concepts in all remaining paragraphs (for this chapter and all future chapters).
- Search for an article about avoiding fatigue while computing (ergonomics) and summarize it using the third-person style in the third paragraph. Apply the Normal style. Use the article title in the first sentence of the paragraph and hyperlink it. Use the keystroke for Bold to add font weight to the main concept/keywords. (Bold keywords the first time you mention them.)
- Ctls Save your file with the keystroke (if using Word).
1.8 Test your system's speech, audio, and video apps.
1.8.1 Text to Speech Listening.
Listen to the writing you did previously using one or more of the options below. Did it help you locate errors to correct?
If you are an auditory learner, or your eyes are tired, I recommend listening to the course materials and readings to help improve information retention. Set up your computer now so you can listen to the remaining sections of this page.
Choose the Chrome extension first. If you don't like it, then use a built-in option for your laptop, desktop, or try a phone app.
- Windows
- Follow instructions for set-up and use of Speech/Text-to-Speech and the Narrator controls:
- In general, use this keystroke:
WindowsCtrlEnter - Learn more at Windows 10 Narrator Get Started.
- In general, use this keystroke:
- To read an entire window, click the window and then press CtrlShiftspacebar.
- To silence the speech, press Ctrl.
- Test the voice on a selection of text in a browser tab.
- Alternatively, try the Natural Reader application for your Windows phone. UNTESTED; use at your own risk.
- Follow instructions for set-up and use of Speech/Text-to-Speech and the Narrator controls:
- MacOS
- From the menu, choose then .
- Click the or option.
- Choose a new voice from the Speech menu. If you like Siri's voice, choose Samantha.
- Use the Optionesc keystroke provided, or choose a new one.

- Test the voice on a selection of text in a browser tab.
- Chrome
- Click the 3-dot menu at the top right of the Chrome browser window, then choose More Tools.
- Choose Extensions from the popup list.
- Scroll to the bottom of your list of extensions (if any) on the left to click on Open Chrome Web Store.
 Search for Natural Reader
and add it to Chrome. The icon
will show up in the Chrome Extension Toolbar to the right of the Address/Search box.
Search for Natural Reader
and add it to Chrome. The icon
will show up in the Chrome Extension Toolbar to the right of the Address/Search box.
- Test the voice on a selection of text provided in the options, or in a browser tab.
- Right-click on the icon to choose . If you are able to, change languages/accents, volume, and other settings.
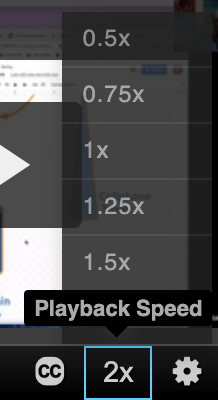
Got ADD or ADHD? When listening to video media, increase the playback speed to match the speed of your mind.
1.8.2 Speech to Text Dictation.
- Experiment with dictating when writing.
In the fourth paragraph dictate a summary of your thoughts on listening to your writing
to help you locate errors.
- Windows Microsoft Word
- Search for Windows Speech Recognition.
- Read the purpose screen.
- Choose a microphone.
- Read into the mic to test its ability to hear you.
- If you want your computer to analyze and learn your voice better, choose Enable Document Review.
- Use the CtrlWindows keys to turn the tool on and off.
- View the reference sheet to teach your computer to understand your words (may require you to use Edge browser).
- Choose whether you want the speech tool to start up when you start up your computer.
- Use the tutorial provided if you want to control the computer with voice. Skip it if you just want to type with your voice.
- Click the microphone popup bar then 'write' with your voice.
- Click the X on the popup to close the speech recognition feature.
- Mac Microsoft Word
- Type fnfn or > Start Dictation to active voice typing.


- Notice the microphone popup icon.
- Write with your voice.
- Click Done on the microphone popup to close the dictation feature.
- Type fnfn or > Start Dictation to active voice typing.
- Google Docs
- From the Tools menu choose Voice Typing (or type ⌘Shifts).
- Click the microphone popup icon then 'write' with your voice.
- Click the x on the popup to close the Voice Typing feature.

- Windows Microsoft Word
- How well did that work? Read or listen to what you dictated and correct grammar and spelling. Add Bold to key concepts and keystrokes you mentioned.
1.8.3 Audio recording shared from a cloud drive.
Learning to present yourself in audio and video is a necessary job skill. Some companies require remote video interviews, audio and/or video meetings, and narrated presentations. The following skills will help you improve your professional communications style.
- Record your voice using your computer's microphone and the built-in tools.
Your computer must have a microphone installed. If it doesn't, you can record your voice from a cellphone voice recording app.
Adjust the volume as needed even if you are speaking loudly and clearly.
Record a 30-second summary of your thoughts on using dictation to write.- For Windows:
- Launch the Voice Recorder app.
- Click microphone to record.
- Click the stop icon to stop recording.
- Trim and crop the recording with built-in tools remove unnecessary dead space and keep the recording at or below 30 seconds.
- Ctls Save the file with the keystroke with this filename: dictation-writing, and into the CS 101 folder in the Documents area.
- If you were unable to save it to the CS 101 folder, then locate it in the Recent Places area.
- Drag the file from your hard drive to your OSU OneDrive cloud drive's CS 101 folder.
This becomes the backup file.

- Right-click on the backup file in the OneDrive file list and choose the Share icon.
- Share the file with anyone at OSU but don't allow editing and block downloads.

- Click the link icon and copy the sharing URL provided.


- For Mac:
- Launch the QuickTime Player app.
- Choose > New Audio Recording.

- Click the Stop button when done recording.

- Trim using ⌘t to remove unnecessary dead air
and keep the recording at or below 30 seconds.


- ⌘s to save the file with this filename: dictation-writing into the CS 101 folder in the Documents area.
- Login to your OSU Google Account via the browser. Drag the new file from the CS 101 of your hard drive to your OSU Google Drive's CS 101 folder. This becomes the backup file.
- Right-click on the backup file on the Google Drive file list and choose Share.

- Share the file with anyone at OSU as a Viewer.
Copy the sharing URL provided.

- For Windows:
- In the fifth paragraph, type Listen to my notes about dictation writing.
Then, to create a hyperlink to that audio file,
select the last two words of that sentence,
Cntrl or ⌘k, then
paste the sharing URL you copied into the hyperlink field of the popup. Submit.
The link will look like this:

1.8.4 Video recording shared with YouTube.
- Record a 30-second summary of the skills you've learned in this chapter.
Record yourself using your computer's webcam.
If your computer doesn't have a video/webcam, then you can use your
cellphone and the YouTube app. Sign in to the App using your OSU Account, is possible.
Another option is to record using your cellphone's Camera app, then transfer it to your Google Drive and from there,
download it to your hard drive before uploading it to your OSU YouTube account.
If you are reluctant to upload to YouTube, please note that the required YouTube settings ensure that your file is not searchable. Only TAs and the Instructor will have access to the YouTube recording. You can remove it after the course is over.
To ensure a good viewing experience, adjust the following:- The lighting, so that your face is well lit.
- Your position, so your head is at the top of the screen rather than the middle or bottom.
- The distance, so we can clearly see your expressions.
- The volume, so we can hear you clearly.
- Wear professional clothing.
- For Windows:
- Launch the Video Recorder or Camera app. (If your desktop does not come with either application, feel free to use your phone or digital camera.)
- Click camera icon to record.
- Click the stop icon to stop recording.
- Trim the recording to remove dead space at the beginning and end, if any, using one of these methods:
- Video App: Using Ctlt.
- Camera App: Choose
See all Photos , choose the video file, then choose Edit > Trim.
- Save or ... > Save As the file to your CS 101 folder and name it CS 101 Ch 1 Skills Learned.
- For Mac:
- Launch the QuickTime Player app.
- Choose > New Movie Recording.

- Click the Stop button when done recording.
- Save the file with this filename: video-to-youtube in the CS 101 folder.
- Using ⌘t, access the Trim area to remove unnecessary dead space at the beginning and end of the recording. Trim the file to below 30 seconds.
- Use the Share button to open a connection to your OSU YouTube account's upload area.
 If the upload progress screen quickly disappears, then authentication between QuickTime and YouTube did not work.
Use the instructions for uploading at YouTube.com (below) to complete the upload.
If the upload progress screen quickly disappears, then authentication between QuickTime and YouTube did not work.
Use the instructions for uploading at YouTube.com (below) to complete the upload.
- For Chromebook:
- Navigate to the Chrome browser's More Tools > Extensions area and
choose the Chrome Web Store link at the bottom of the left sidebar.


- Search for Video recorder webcamera.io
- Download the WebCamera.io app and allow microphone and camera access.

- Launch the app from the Launcher screen.
- Click the red Record button to record your summary.
- Click the white Stop button when done recording.
- Trim and crop the recording with built-in tools remove unecessary dead space and keep the recording at or below 30 seconds.
- Save the file to your hard drive or Google Drive.
- Locate the new file.
- Right-click on the file name in the list to Rename it.
- Navigate to the Chrome browser's More Tools > Extensions area and
choose the Chrome Web Store link at the bottom of the left sidebar.
- Navigate to YouTube Studio.
- Login using your OSU Google userID and password.
- Click the Videos menu to view the list of uploaded videos.

- If you've never used the Studio with your OSU account, the list will be empty.
- If you used Quicktime to generate the video, then look to see if it is listed here. If not, move onto the next step.
- Click the Create > Upload button to locate your movie/video file on your hard drive.

- In the Details area, fill in the Title, Description, Playlist (optional), and Audience.
Click Show More and fill in the Altered Content, License, and Remixing options. These help with privacy.


- In the Visiblity area, click the Unlisted setting.
This ensures your video won't be searchable, but will be available for the Instructor and TAs to view.
Only pepole you give the link to will be able to view the video.

- Finish filling in the screens while the video renders.
- Copy the Video Link provided under the preview.
- In the sixth paragraph, type Skills I've learned in this chapter. Then, select that sentence and Cntrl or ⌘k to paste the YouTube URL, which creates a hyperlink to your YouTube video.

- Ctls Save your file if using Word.
1.8.5 Save your file as a PDF.
So that your file is portable to Canvas and the TurnItIn plagiarism checker, print, save, or export it to the Portable Document Format (PDF):
- Windows
From the menu, choose > PDF > Best for electronic distribution and accessibility.
You can also print to a PDF using Ctrlp. Choose PDF from the list of printers. - MacOS
From the menu, choose and choose PDF.
OR, ⌘p to Print a PDF file. Choose PDF from the list of printers and Best for Electronic distribution and accessibility. - Google Applications
From the menu, choose Download as PDF.
1.9 Verify your work.
Doesn't your document look nice?

← The final document should have Heading 1, Heading 2 applied and Normal paragraph style has been updated to include a .25 first-line indent as well as 10pt of space after.
The screenshot is cropped to remove unimportant information at the bottom and all CS 101 folders are visible. The paragraphs summarize your use of folders, keystrokes, research about keystrokes, as well as research about ergonomics. Key concepts are set in bold type in paragraphs 2 through 6. Hyperlinks are in the titles of articles.
Hyperlinks to the shared audio and video files open without access issues. Audio and video recordings are 30 seconds long and are easy to hear/see.
Compare your work to the Rubric.
While in the chapter's Canvas assignment screen, scroll to the bottom to see the Rubric. Compare your work to the Rubric to ensure you've included all paragraphs and materials. The rubric is based on these scoring criteria, which are based on the instructions above: Check off each item to confirm you've completed them before submitting the file.
- File is free of plagiarism.
- File is saved as a PDF file.
- Document sharing URL is provided in the Assignment Commenting box.
- Document's first line of text (title of document) has Heading 1 style applied.
- Document's second line of text (student name and chapter) has Heading 2 and italic styles applied.
- Document's Normal style is updated with a .25-inch first-line indent and 10pts of space after paragraphs.
- Document's updated Normal style is applied to all paragraphs of the document.
- Document paragraphs' Keywords are bolded.
- First paragraph describes Operating System updates made and the creation of folders for the hard drive and 3 cloud drives.
- A single, closely-cropped screenshot of all four drives' files is placed under the first paragraph of the document.
- A CS 101 folder is visible in all four windows of the screenshot.
- Second paragraph describes previous and new use of keystrokes.
- Third paragraph describes the content of an article about ergonomics and the article title is hyperlinked.
- Fourth paragraph describes listening to help edit writing.
- Fifth paragraph hyperlinks to the student's 30-second audio recording about dictation writing, which is shared from the Google or Microsoft cloud drive.
- Sixth paragraph hyperlinks to the student's video recording about skills learned so far, which is shared from YouTube.
- Document is free of spelling and grammar errors.
1.10 Submit the file and sharing URL.
Every chapter in this textbook will provide the following information about how to submit your file as well as how to share your file when you need the instructor's help. This week, you are required to share the file so you learn how early in the term, rather than later. Share your word processing file when you submit the final PDF file.
Each assignment must be submitted before the Due date and time as specified on the Canvas Home tab. The Available Until date and time constitutes a grace period, which can be used in an emergency, or if you are ill (it cannot be used for every assignment). Students who submit using the Available Until date may incur score reduction. Students on a DAS Flexibility Contract: there is no need to notify the instructor. All of your Available Until dates will be set to 72 hours past the Due Date, which can be used up to 3 times. Abuse of the Flexibility Contract will be reported to DAS.
- Click on the Canvas Home button and scroll down to the chapter assignment. Click the assignment link.
- Upload the PDF file and paste in the Sharing URL:
- Share a Microsoft file:
- Sign in to the OSU OneDrive. Provide your ONID userID and password.
- Save the file to the OSU OneDrive if it isn't already saved there.

- With your file, open, click the Sharing button at the top right of the screen.
- Copy the Link address.

- Paste the URL of the shared word processing file in the Assignment > Commenting box when you submit the PDF file, or after you submit it.
- Share a Google file:
- Sign in to the OSU Google Drive. Provide your ONID userID and password.
- Create your file on the OSU Google Drive.
- Click the Sharing button at the top right of the screen.
- Click the Advanced link on the lower right corner.
- Click the Change link to view the choices.
- Change the settings so that On - Anyone at Oregon State University with the link and Can view are selected.
- Copy the resulting URL/address.

- Paste the resulting URL into the Assignment Commenting box.
- Share a Microsoft file:
- Confirm that the PDF file uploaded. It is also a smart idea to view the submitted file to ensure it is the right file!
 Check the TurnItIn Report for plagiarized phrases and sentences.
Review how to use TurnItIn.
Edit or add quote marks in your original file to ensure the second draft of the file will pass the TurnItIn inspection.
Resave the PDF file.
Upload the newer version in the assignment's Submission Details screen.
Check the TurnItIn Report for plagiarized phrases and sentences.
Review how to use TurnItIn.
Edit or add quote marks in your original file to ensure the second draft of the file will pass the TurnItIn inspection.
Resave the PDF file.
Upload the newer version in the assignment's Submission Details screen.

- Within 3 days of submission, be on the lookout for Rubric feedback and Comments from the TA and Instructor.
- Ask questions about the score and feedback in the assignment's Commenting box.
