Chapter 4 ~ How Data Collection Works
⬆ Shiftrefresh Shift-Refresh this page to see the most up-to-date instructions.
During the 2016 election cycle, 'bad actors' tied to the Russian government contributed to millions of pages of fake news being presented to people within Facebook feeds. This dissemination of disinformation may have affected the outcome of the election. Many other countries' elections were also affected by this problem. Subsequent studies have determined many citizens do not know the difference between factual, opinion, and dis-informational writing.
To combat this problem, use the following research and learning activities to ensure that you are prepared to view the most factual news to foster life-long learning.
In this chapter, you'll design a set of theme layouts for a slide presentation, write about search and advertising data collection, add related media, then publish the final presentation in various formats, so you can share them with others.
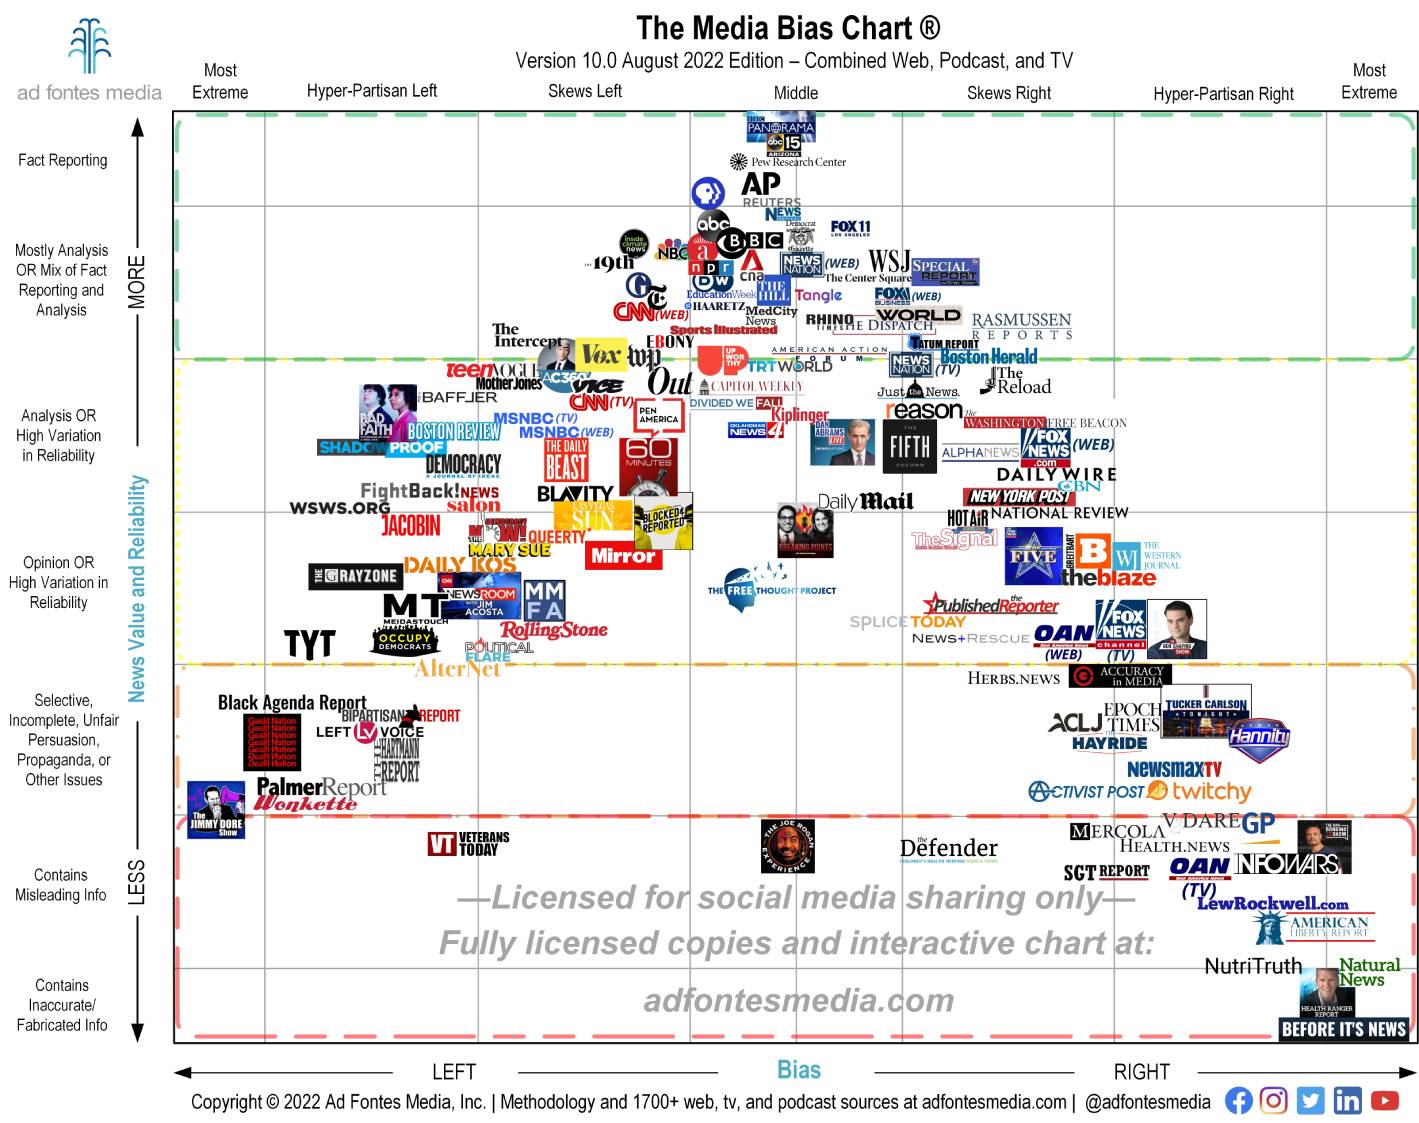
Then, in discussion, you'll use a news feed app to research to analyze media bias.
This chapter's skills and discussion will take between 4 and 12 hours to complete.
Print these instructions.
The following procedure has many steps, which are perhaps easier to follow when you print and check them off as you go. Hide/close + the previous section to avoid printing too many pages.
A slideshow presentation file allows us to write, style, edit, and animate presentations for online tutorials, speeches with audience participation, and interactive animations.
The diagram below outlines some of the most common options regardless of the brand. This diagram is from Google Slides but Microsoft PowerPoint, and Apple Keynote also provide the same tools.

4.1 Design presentation theme layouts.
In this lesson, you'll design a cover and text slide styled to reflect OSU's marketing style. The cover slide theme layout will include the OSU's color scheme, font, and logo. The text slide theme layout will accommodate longer paragraphs (like a book), rather than bulleted phrases (like lecture notes).
4.1.1 Launch a presentation application.
Start with a blank file (rather than a template):
- Microsoft PowerPoint:
- Click the Blank Presentation icon.
- Change the title to How Data Collection Works.
- Update the dimensions of the slideshow from the > screen
(or the tab's menu).
Choose On-screen Show (16:9) and revise the dimensions to
10in wide and 5.63in high.

- Choose to Scale or Ensure Fit the contents of the master slide.
- Ctrls save the file with this filename: How Data Collection Works.pptx and move it to your CS 101 folder.
- Google Slides:
- Click the New icon at the top left of your Google Drive's CS 101 folder then select Google Slides or Presentation.
- Change the title from Untitled document to How Data Collection Works.
- Confirm that the dimensions of the slideshow are set to Widescreen 16:9
via the > screen.

- Click the folder icon to move the file to your CS 101 folder on the Google drive (if you didn't start out in that folder).

4.1.2 Design a cover slide template.
Modify the theme cover layout of an existing theme to make a new theme.
- Microsoft PowerPoint
- Depending on the version of PowerPoint:
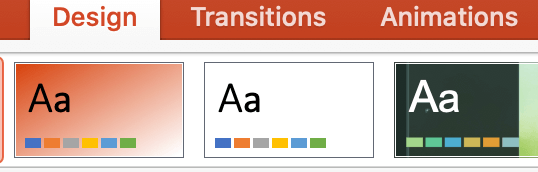
Either access the > tab,
or access the > SlideMaster > Themes menu. Choose Save Current Theme or click the Rename button. Save/Rename the theme name as Beavers.thmx. Then, Select the Beavers theme from the list of Themes.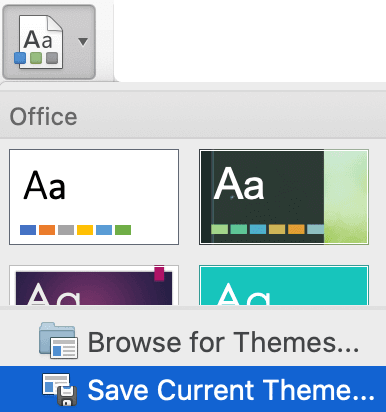
- From the tab Choose . Choose the second master slide design.
- In the list of Beavers slides, click on the first Layout slide.
Rename it CS101 cover.
The Rename button is located in the top left corner in the Edit Master window.
The right-click menu also provides a Rename layout option.

- From the tab's
area, click the Solid Fill button, then click the Paint Bucket icon, then choose menu.
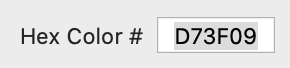
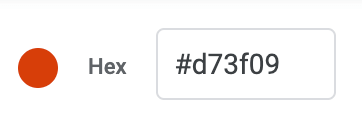
Activate the color picker. Select the RGB Sliders option and type in this
Hex value: #D73F09 or RGB value: 215, 63, 9. This hue is OSU's Beaver Orange (which looks more like red orange).
Click OK.
- PowerPoint for Mac

- PowerPoint for Windows

- PowerPoint for Mac
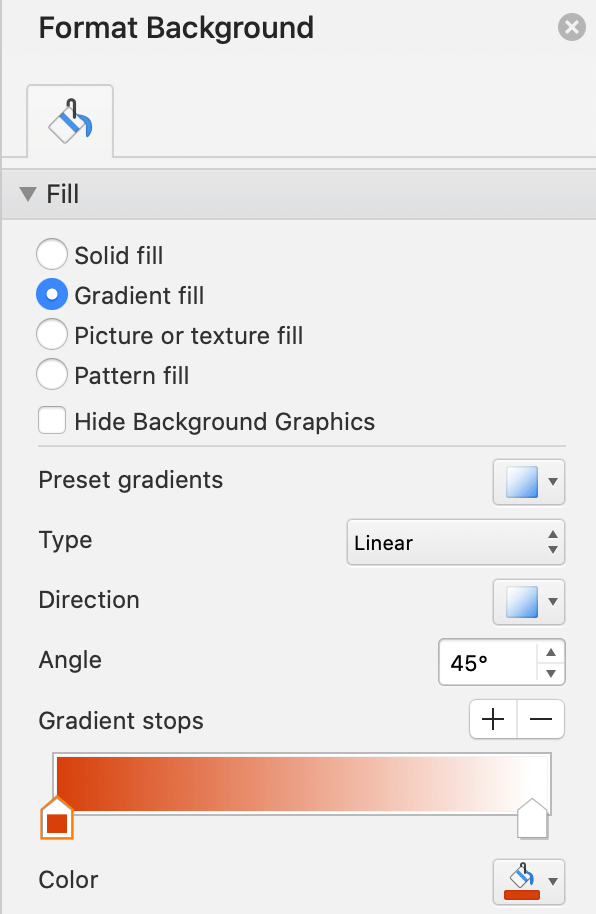
- Click the Gradient Fill button. Change the Type option to Linear, the angle to 45°, and click on the Gradient Stops slider's left pointer.
Change the color to Beaver Orange, which shows up on the Recent Colors section of the color picker.
Click the slider's right pointer and change the color to White.
If there are other pointers between the left and right, click and drag them down to remove them from the slider.
Save the file again.
- Click the top textbox that says Click to edit master title style.
Right-click to choose the menu, then change the font to Open Sans or Tahoma and Bold in size 48 white and aligned to the left.

Click the second text box Right-click to choose the menu, then change the font to Open Sans or Tahoma and Bold in size 24 white and aligned to the left.
- Remove the three footer textboxes at the bottom of the master slide layout.

- Right-click on this OSU logo:

- Choose Copy the image then paste it onto the master slide.
- OR, choose Copy image address then > Image > By URL. and paste the URL into the field and submit/insert.
- Move the image to the lower-right corner of the slide
(but not to the very edge; leave about 1/8-inch breathing room).
Then, with the image selected, click the Format Picture button and select tab. Click the Lock Aspect Ratio button before changing the Width Scale to 75%.
- Depending on the version of PowerPoint:
- Google Slides
- From the Themes pane on the right of the new Slides document,
scroll to down and click on the Spearmint theme.

Close xthe Themes pane. - From the main toolbar, > .

- Right-click on the Spearmint's main Theme slide and Rename Theme.
Change Spearmint to Beavers.


- In the list of Beavers theme layouts, right-click on the first Layout slide. Rename it CS101 cover.
- Click on the CS 101 cover theme layout, then select the green line between the two headings. Delete it.
- Click the Background button and from the color palette, click the
Custom button, and in the first field at the top,
type #D73F09. This hue is OSU's Beaver Orange (which looks more like red orange).

Click the Color Palette's Gradient tab and click the Custom button to adjust the style of gradient. Click the left handle of the gradient bar then choose the Beaver Orange color. Click the right handle of the gradient bar then choose White. Change the Type to Linear and the Angle to 45°. Click OK and Done.
- Click the top textbox that says Click to edit theme title style.
Change the font to Roboto Black (or use Roboto in Bold, if you don't have more Roboto options available).

Click the second text box and change the font to Roboto Bold.
The font sizes are set to 48 and 24, which is just right; no need to change them. - Right-click on this OSU logo:
- Choose Copy the image then paste it onto the theme slide.
- OR, choose Copy image address then > Image > By URL. and paste the URL into the field and submit/insert.
- Move the image to the lower-right corner of the slide
(but not to the very edge; leave about 1/8-inch breathing room).

Then, with the image selected, click the Format Options button and select . Click the Lock Aspect Ratio button before changing the Width Scale to 75%.
- From the Themes pane on the right of the new Slides document,
scroll to down and click on the Spearmint theme.
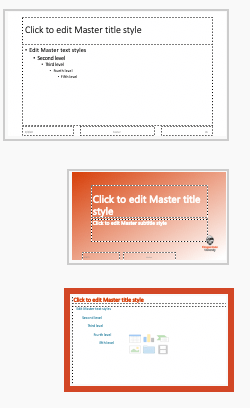
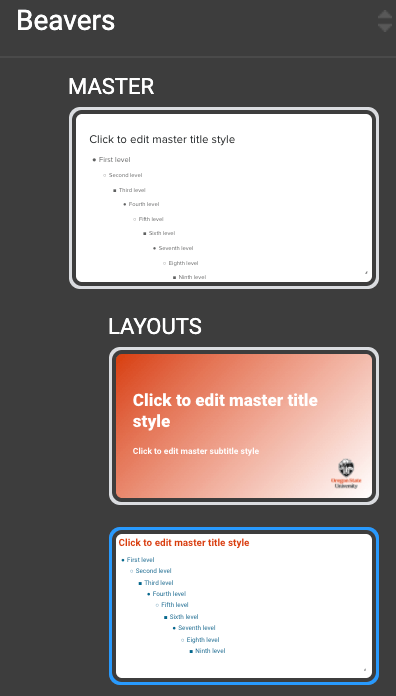
The final slide should look like this in Microsoft PowerPoint and Google Slides:
![]()
4.1.3 Design a text slide template.
Instead of writing in short bulleted lists, you'll be writing in longer paragraphs on each slide. So, to ensure all slides with paragraphs have the same style, you'll create a text theme layout that uses OSU's color scheme, font, and less margins.
- Microsoft PowerPoint
- From the tab choose the third slide layout.

- From the tab, choose and change the slide master name to CS101 text.
- Click the top textbox that says Click to edit Master title style.
Right-click to change the font paragraph settings.
Change the color to Beaver Orange and the font to Open Sans or Tahoma with Bold size 28pt
(the size shown below is too big; use 28pt). And, align the text to the left.

- And, move this textbox closer to the top and stretch it to the right and left edges using the round gray handles.
- Select Ctrla all the text in the second textbox of placeholder text.
Right-click to access the Font options.
Change the font to Open Sans or Tahoma and the size to 18pt.
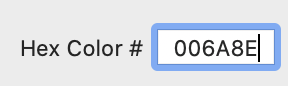
Click Paint Bucket > More colors... > Custom > Hex color #.
Add a new color called OSU Stratesphere Blue using a Hex value of #006A8E or RGB value of 0, 106, 142.

Click OK. -
Right-click on the placeholder text again and access the Paragraph options.
Update the line height of 1.5 and remove the hanging indent.


- Either right-click on the textbox to choose Bulleting and None
or choose the tab's Bulleting menu to turn off bullets beside the lines of text.


- While you have the text selected, from the menu, choose Ruler. Slide the margin and indent pointers all the way to the left so that the textbox text will line up with the heading.
- Remove footer text blocks, if any, from under the main text box.
- Move the main textbox closer to the title textbox so it touches.
Also, stretch it to the right and left edges using the square gray handles. Also, stretch it so the bottom of the textbox touches the bottom edge of the slide.
Drag the edge of the bottom textbox to the left and stop when it snaps into alignment with the top one. - While still in the Master slide editing area,
choose the palette,
 Select the Hyperlink and Customize Colors button.
 Change the Hyperlink Hex color to #D73F09 or RGB color to 215, 63, 9.
 and rename it Beaver Orange.

- Under Beavers theme master slide > Layouts list,
Shift-click on each unused layout then delete them from the list,
so that you have just your two new layouts in the Beavers theme.
- Exit out of the area by clicking the big red X.
- From the tab choose the third slide layout.
- Google Slides
- If you are not in the Edit Theme area, then choose > from the main toolbar.
- Click on the Beavers > Title and Body layout slide. Rename it CS101 text.
- Click the on green line at the bottom and delete it.
- To style the heading textbox: click the textbox that says Click to edit theme title style. From the color palette, choose Beaver Orange from the Custom palette. Also, change the font to Roboto Bold size 28pt.
- Move this textbox closer to the top and stretch it to the right edge using the square blue handles.
Reduce the height of the textbox so it ends just under the text.


- To style the main textbox on the CS 101 Text theme layout,
click the textbox that has bulleted lists and select all of the example text.
Click the color palette Custom button, and in the first field at the top,
type the Hex value #006A8E or RGB value 0, 106, 142. This hue is OSU's Stratosphere Blue.
Change the font to Roboto size 18pt, and the line spacing to 1.5.
You may need to turn off Autofit. From the Format menu, click Text Fitting and Do Not Autofit.

- Move this textbox up so it touches the heading textbox.
Stretch the box using the blue corner handles so each touches the left, bottom, and right edges of the slide canvas.

- Update the hyperlink color by clicking the Theme button > Choose a Theme Color > Link.
Change the Link color to Beaver Orange: Hex value #D73F09 or RGB value: 215, 63, 9.
- While still in the Edit Theme area,
select, right-click, and delete all unused theme slides in the long list under Beavers > Layouts,
so that you have just your two new layouts listed in the Beavers theme list of slide layouts.
- Click the X to exit out of the black the Edit Theme screen.
The final slide should look like this:
- Microsoft PowerPoint:

- Google Slides:

4.1.4 Apply the templates and edit the text.
- Microsoft PowerPoint
- If the first slide does not already have the Beaver Theme's CS 101 Cover layout applied,
then add it from the tab's > CS101 Cover theme layout area.

- Double-click the title textbox and change the title to How Data Collection Works (you may have done this already).
- Double-click the subtitle textbox and type your first and last name.
- From the tab, add New slide and choose the CS101 Text theme layout.
Or, from the or > menus,
choose the CS 101 text theme layout from the list of options.

- If the first slide does not already have the Beaver Theme's CS 101 Cover layout applied,
then add it from the tab's > CS101 Cover theme layout area.
- Google Slides
Typically, the cover slide will automatically have the cover layout of the theme applied. If you aren't sure if it is, continue:- Select the first slide
and > > CS 101 cover from the list of Beaver layouts.

- Click into the title textbox and change the title to How Data Collection Works.
- Click into the subtitle textbox and type your first and last name.
- Add a second slide using the + menu. > CS 101 text from the list of Beaver layouts.
- Click into the heading textbox and change the title to How Search Works.
- Add 6 more slides (with the CS Text layout applied) to accommodate the writing you'll do in step 4.2.
- Select the first slide
and > > CS 101 cover from the list of Beaver layouts.
4.1.5 Add a transition.
To accommodate hands-free reading of the presentation, add a transition from slide to slide:
- Microsoft PowerPoint
- From the tab, choose Wipe > > From Right.

- Change the Duration to .3 (a 3-second change to the next slide)
and the After to 20:00 (twenty seconds to read the text).

- Click the Apply to All button. This ensures that all new slides will have the same transition.
- From the tab, choose Wipe > > From Right.
- Google Slides
- With any slide selected, click the
- Select Slide from the Right from the menu.

- Slide the timing bar from Slow to Fast (to transition quickly from one slide to the next).
- Click the Apply to all slides button. This ensures that all new slides will have the same transition.
View the slideshow in Presentation mode to ensure that the transitions work from slide to slide.
4.2 Write about data collection.
View the sources below and summarize them; one per slide. On each text slide you'll write a single paragraph of 10 to 11 lines (roughly 130 words), however, you may add another slide to accommodate more than 11 lines of writing for any given topic. Cite sources using hyperlinked titles in sentences in the paragraphs. Check spelling with built-in tools. On the last slide, you'll add the Bibliography of sources.
4.2.1 Write about How Search Works.
-
How Search Works.
Add the movie to your bibliography tool.
On slide 2 of your presentation file, update the Title to say How Search Works. - Write a single paragraph in the third-person style that summarizes how search works. Write in your own words (do not copy or quote what you heard or read). Explain concepts such as spider algorithm (crawling), hyperlinks, index, page rank, and cultural meanings.
- Write only as much as will fit on the slide but write a full page of details. Be thorough but concise and do not repeat yourself. Each slide should hold about 130 words. Refer to the Example in the previous step. If you want to write more than 130 (10 lines of text) then add a second slide and add Continued to the heading.
- Add the source to your bibliography tool. Cite the source using a hyperlinked title in a sentence in the paragraph. Select important keywords and apply the Bold style.
4.2.2 Write about how online advertising works.
-
Online Advertising: Crash Course Media Literacy #7.
Add the movie to your bibliography tool. The Crash Course video authors are Green, Hank and John and the date of publication is listed on YouTube, and the publisher is Complexly.
Add a new slide (3) and update the Title to say How Online Advertising Works then write a single paragraph in the third-person style. Explain concepts such as cookies, algorithms, niche products, tracking, sponsored ads, editorial content, analytics, behavioral targeting, and/or terms and conditions. Add the source to your bibliography tool. Cite the source using a hyperlinked title in a sentence in the paragraph. Select important keywords and apply the Bold style. - Click to read: Advertising and Marketing on the Internet: Rules of the Road
Add another new slide (4) titled Truth in Advertising Laws and write in the third-person style. Explain concepts such as credibility, disclaimers, refunds, COPPA, MLM, Pyramid schemes, fair credit reporting, warranties, guarantees, claims, shipping, testimonials, endorsements, and non-compliance. Add the source to your bibliography tool. Cite the source using a hyperlinked title in a sentence in the paragraph. Select important keywords and apply the Bold style. - Click to read: U.S. Digital Advertising Industry: Statistics & Facts.
Click the Read more link to see the entire article.
Add another new slide (5) titled Who Profits from Online Advertising? and write in the third-person style. Explain concepts such as revenue, spending, search ads, penetration rates, mobile ads, and ad-blocking software, as well as who the major profiteers are. Add the source to your bibliography tool. Cite the source using a hyperlinked title in a sentence in the paragraph. Select important keywords and apply the Bold style.
4.2.3 Write about how data mining works.
- Data Mining by The Checkout.
- Add a new slide (6) and update the title to say How Data Mining Works then summarize in the third-person style. Explain concepts such as loyalty programs, microtargeting, geotracking/geolocation, bribes, third-party advertisers, and cyberpsychology.
- Add the source to your bibliography tool. Cite the source using a hyperlinked title in a sentence in the paragraph. Select important keywords and apply the Bold style.
- Are you concerned about your data being mined? Learn more from Comsumer Notice.org's Data Mining article. Scroll to the section "How to Protect Yourself From Data Mining Risks".
4.2.4 Write about how Chatbot AI.
-
The Horrifying Dangers of ChatGPT (2023)
Here are the chapter locations on the video, so you can target your listening if you are short on time:- 0:00 - The Dark World of ChatGPT
- 1:02 - We're Being Used As Guinea Pigs
- 4:16 - The Cybercriminals of ChatGPT
- 8:00 - Skip over the endorsement/sponsorshop inform ←
- 8:54 - The Bug that Leaked User Information
- 11:05 - D.A.N. "Do Anything Now"
- 12:59 - The Undetectable Virus
- 15:19 - Inappropriate Content on ChatGPT
- 17:38 - AI is Going to Control Us
- Add a new slide (7) and update the title to say The Dark Side of AI Chatbots then write a single paragraph in the third-person style that summarizes how AI chatbots can steal, create malware, attack governments, or create inappropriate content.
- Add the source to your bibliography tool. Cite the source using a hyperlinked title in a sentence in the paragraph.
- Check and correct grammar and spelling using the built-in functions, and, if possible, one of these extensions:
Grammarly plugin,
or LanguageTool Chrome extension.
- Click the Review tab on the ribbon. Click Spelling or Spelling & Grammar.
- Click Tools > Check Spelling > Spell check. A box will open in the top right corner.
- ⌘; or choose Edit > Spelling and Grammar > Check Grammar With Spelling (a checkmark indicates it’s on), then choose Check Document Now.
4.3 Add a Video Recording
- Title the 8th slide How Humanoid Robots are Evolving.
- Select and delete the textbox below the heading textbox.
- Search for and insert a related video (find one that doesn't match the example):
- Microsoft Powerpoint
- From your browser, search YouTube for a video related to Humanoid Robots 2024. Use the Share menu to copy the sharing URL for the video.
- From the PowerPoint and Media menus, choose Online Video.
 If your version of PowerPoint does not have this option, see the procedure below.*
- Paste the sharing URL you copied previously, then click the searchSearch icon to locate the video.
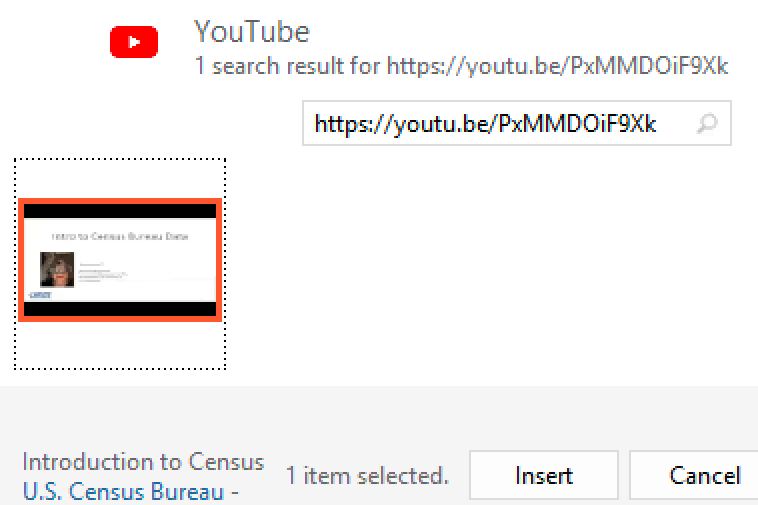
- Select the video in the results list then click the Insert button.
- Click the video on your slide to access the resizing handles.
- Stretch the video to fit below the heading and to the left, bottom, and right edges of the slide.
- Take a screenshot of just the beginning screen of the video (not a whole YouTube page); just the video.
- Insert the screenshot into your slide and stretch it to fit.
- Add a hyperlink to the image so it will launch the YouTube page.
- Google Slides
- From the menu choose Video.
- Search YouTube for a video related to Humanoid Robots 2024.
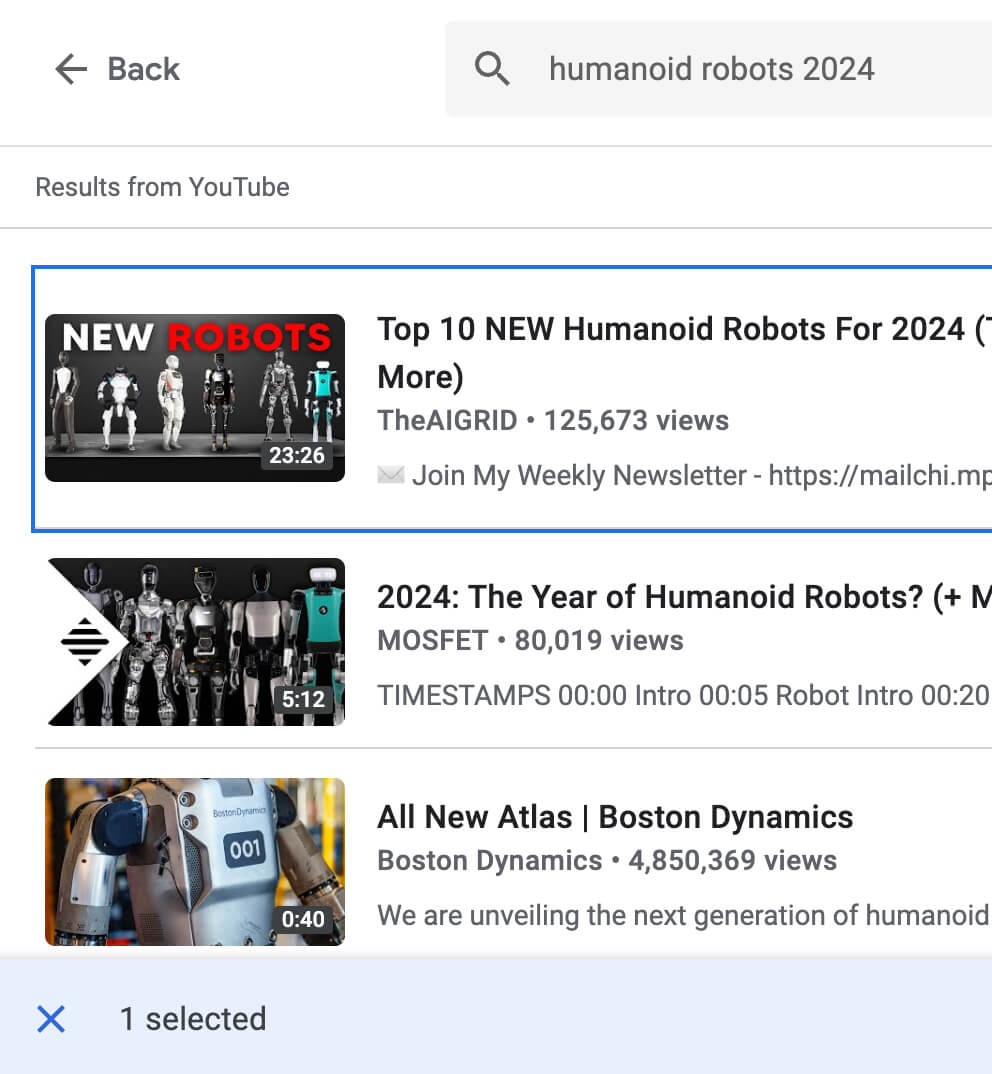
- Select the video of your choice from the results list. Click the Select button.
- Click the video on your slide to access the resizing handles.
- Stretch the video to fit below the heading and to the left, bottom, and right edges of the slide.
Later, when you Save, Export, or Print to a PDF file, be sure to click on the video in the PDF to see if it works. Ideally, it would play within the PDF or open in a new browser tab. If it isn't clickable, then also check to see if the title hyperlinks work in the rest of your document. If not, then try a different method of making the PDF: Save, Export, or Print.
Add the source to your bibliography tool. Do not cite YouTube...locate the actual publisher. - Microsoft Powerpoint
4.4 Add a Bibliography.
- Add a new slide (9) and update the heading to say Bibliography.
- Paste in the bibliography entries saved from your bibliography tool. There should be 7 entries. Be sure to add author names, titles, publish dates, and publisher names if your tool did not provide them (for example, YouTube an OSU are not the author, title, or publisher of user-uploaded media).
- Select all of the bibliography text,
and apply size 13pt.
Then, click the numbering icon to separate them.

4.5 Share the presentation in multiple ways.
4.5.1 Doesn't your presentation look great!

The CS101 Cover theme layout has an Beaver Orange background transitioning to white at a 45 degree angle. The OSU logo is transparent, reduced in size, and placed in the bottom right corner, just off edge. Both headings are left justified in White in Open Sans or Tahoma (PowerPoint) or Roboto (Slides) font. The first heading uses either of those fonts in Black or Bold size 48pt font and the second heading uses either of those fonts in Bold sizes 24pt font.
The CS 101 Text theme layout has small margins to accommodate lots of writing. The headings are set to Open Sans or Tahoma in Bold, or Roboto Bold or Black size 28pt in Beaver Orange. The textbox is set to Roboto Normal size 18pt in Stratosphere Blue with 1.5 line height to accommodate 10 or 11 lines of text (notice none of the text is bulleted). The line spacing should not change when adding an 11th line. If it does, then add a new slide below it to finish the writing.
The Bibliography slide is set to Roboto Normal size 13pt in Stratosphere Blue with 1.5 line height.
4.5.2 Save as PDF.
Save the presentation as a PDF file. This is the primary file you will submit in Canvas later.
- > PDF/XPS. Save the file to your CS 101 folder on the hard drive.
4.5.3 Publish/share the file.
In order for others to see your presentation without having to download, ask for permission, or look at your editing file, share it publically, or publish it to the web. The goal is to provide a live link that starts the presentation in presentation mode without any hassles. Share/publish the file using the correct cloud drive:
-
- > Save as PPSX or Show... file.
- Login to your OSU OneDrive account from the browser.
- Drag the file from your hard drive to the OSU OneDrive file list in the browser to transfer it there.
- Beside the file name in the list, click the icon:

- Choose the settings provided in the screenshot below:

- Copy the link so you can provide it to the instructor or in the Assignment Comment box.


 View and play the URL using the Presentation icon to ensure all pages are provided and the video plays.
-
> .
Change the transition time to Every 15 seconds to allow enough reading time.
Click the Publish button.
Copy the resulting sharing URL, which will get pasted into the
Canvas Assignment Commenting box of the Submission Details page.


View and play the URL to ensure all pages are provided and the video plays.
4.5.4 Extra Credit: export or capture as a video.
Some audiences prefer to view a presentation file as a video with voice-over and imagery. Learn how to provide that option:
- Microsoft PowerPoint
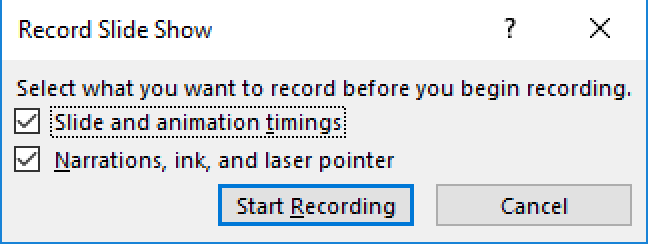
Versions for Mac and Windows offer different options.- From the tab, click on the Record Slide Show button to record narration of each slide.

- Once the narration is complete, then > Export as > Mp4.

- Older versions of PowerPoint may hide the narration features in the File > Export > Create Video area. Reduce the quality to lower the file size, since you'll host it on your OneDrive rather than YouTube.
 And, choose the Record Timings and Narrations feature.
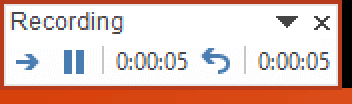
Start Recording your narration of the content of the slides.
And, choose the Record Timings and Narrations feature.
Start Recording your narration of the content of the slides.
 When all slides have been narrated, the recording will stop.
 Click the Video Create button to save the file to your hard drive.
- From the tab, click on the Record Slide Show button to record narration of each slide.
- Use the YouTube (set to "Unlisted") or cloud drive Sharing feature (set so anyone at OSU can view) to capture the sharing URL.
- Copy the Sharing URL from your OneDrive to the Canvas Assignment Commenting box.
-
Google Slides does not offer save as video or the ability to add audio to the file (without third-party add-ons, which OSU doesn't allow).
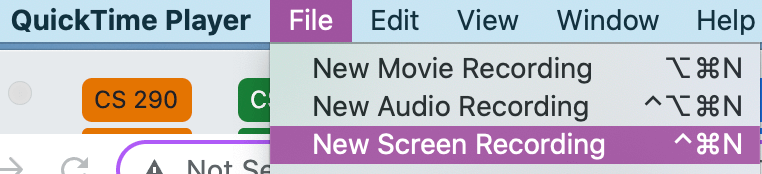
However, you can use screencasting capabilities on your computer to record your reading of the text to create a video presentation.- If you use a Mac computer, screencast using QuickTime (found in the Applications folder).
- For Windows, you can use one of these options:
Screencastify .
If prompted to purchase, go to the
Pricing page to choose the $0 free option.
When recording, only display the slides; no in-slide camera of yourself; it will overlap the text and distract from reading.
.
If prompted to purchase, go to the
Pricing page to choose the $0 free option.
When recording, only display the slides; no in-slide camera of yourself; it will overlap the text and distract from reading.
Use the search bar to locate the Game bar (Win-G). Choose Game capturing. Learn more... - Use the YouTube (set to "Unlisted") or cloud drive Sharing feature (set so anyone at OSU can view) to capture the sharing URL.
- Paste the Sharing URL into the Canvas Assignment Commenting box.
- If you use a Mac computer, screencast using QuickTime (found in the Applications folder).
4.5.5 Extra Credit: Add an animated table of contents.
Many presentations include animated objects, such as textboxes, shapes, tables, and diagrams
to help retain the audience's attention or separate concepts.
The following extra credit skill will teach you automatically create an animated table of contents for your slideshow.
Add textboxes with hyperlinks to existing slides in a new order. Draw arrows, align and distribute the boxes, then animate them from different directions.
The result will look like this (but with this term's updated slide headings/topics):
- Windows PowerPoint version 2016

- Add a new slide under the cover slide.
- Type Table of Contents in the heading textbox.
- Remove the textbox below the heading textbox.
- From the Home tab, Choose and draw a rectangle box with a 3px Stratosphere Blue border.
- Copy the box six more times. Right-click to Align Vertically the first four boxes at the Top and Distribute > Horizontally.
- Place two boxes side by side below the fourth slide. Leave a slim gap between them.
- Place the last box under the first box. Leave a gap between them.
- Double-click in the first box to highlight the text cursor. Cntrl or ⌘k to activate the hyperlink feature. From the Link to: > Place in this Document > scrolling menu, choose the The Dark Side of AI Chatbots slide. Click OK. Select the textbox. From the Animations tab, click the Animations Pane button to show all animations. Choose Fly in from the Animation list, then from the Effect Options menu, choose from left and After Previous.
- Double-click in the second box to highlight the text cursor. Cntrl or ⌘k to activate the hyperlink feature. From the Link to: > Place in this Document > scrolling menu, choose the How Data Mining Works slide. Click Apply. From the Home > Drawing menu > Shape Outline menu, connect a 3pt Stratosphere Blue line with right arrow from the left purple handle of this textbox to the previous textbox. Select the textbox. Choose Fly in from the Animation list, then from the Effect Options menu, choose from top and After Previous.
- Double-click in the third box to highlight the text cursor. Cntrl or ⌘k to activate the hyperlink feature. From the Link to: > Place in this Document > scrolling menu, choose the How Search Works slide. Click Apply. Connect a 3px Stratosphere Blue line with right arrow from the left purple handle of this textbox to the previous textbox. Select the textbox. Choose Fly in from the Animation list, then from theEffect Options menu, choose from top and After Previous.
- Double-click in the fourth box to highlight the text cursor. Cntrl or ⌘k to activate the hyperlink feature. From the Link to: > Place in this Document > scrolling menu, choose the How Online Advertising Works slide. Click Apply. Connect a 3px Stratosphere Blue line with right arrow from the left purple handle of this textbox to the previous textbox. Select the textbox. Choose Fly in from the Animation list, then from the Effect Options menu, choose from right and After Previous.
- Double-click in the left box under the fourth slide to highlight the text cursor. Cntrl or ⌘k to activate the hyperlink feature. From the Link to: > Place in this Document > scrolling menu, choose the Who Profits from Online Advertising slide. Click Apply. Connect a 3px Stratosphere Blue line from the top purple handle of this textbox to the bottom of the fourth textbox. Apply a bottom arrow. Select the textbox. Choose Fly in from the Animation list, then from the Effect Options menu, choose from right and After Previous.
- Double-click in the right box under the fourth slide to highlight the text cursor. Cntrl or ⌘k to activate the hyperlink feature. From the Link to: > Place in this Document > scrolling menu, choose the Truth in Advertising Laws slide. Click Apply. Connect a 3px Stratosphere Blue line from the top purple handle of this textbox to the bottom of the fourth textbox. Apply a bottom arrow. Select the textbox. Choose Fly in from the Animation list, then from the Effect Options menu, choose from bottom and After Previous.
- Double-click in the last box under the first slide to highlight the text cursor. Cntrl or ⌘k to activate the hyperlink feature. From the Link to: > Place in this Document > scrolling menu, choose the How Humanoid Robots are Evolving slide. Click Apply. Select the textbox. Choose Fly in from the Animation list, then from the Effect Options menu, choose Fade and After Previous.
- Google Slides

- Add a new slide under the cover slide.
- Type Table of Contents in the heading textbox.
- Remove the textbox below the heading textbox.
- Draw a square box with a 3px Stratosphere Blue border.
- Copy the box six more times. Right-click to Align Vertically the first four boxes at the Top and Distribute > Horizontally.
- Place two boxes side by side below the fourth slide. Leave a slim gap between them.
- Place the last box under the first box. Leave a gap between them.
- Double-click in the first box to highlight the text cursor. Cntrl or ⌘k to activate the hyperlink feature. From the dropdown menu, choose the The Dark Side of AI Chatbots slide. Click Apply. Select the textbox. From the Insert > Animations > Motion > Object Animations pane, choose Fly in from left and After Previous.
- Double-click in the second box to highlight the text cursor. Cntrl or ⌘k to activate the hyperlink feature. From the dropdown menu, choose the How Data Mining Works slide. Click Apply. Connect a 3px Stratosphere Blue line with right arrow from the left purple handle of this textbox to the previous textbox. Select the textbox. From the Motion > Object Animations, click + Add animation, then choose Fly in from top and After Previous.
- Double-click in the third box to highlight the text cursor. Cntrl or ⌘k to activate the hyperlink feature. From the dropdown menu, choose the How Search Works slide. Click Apply. Connect a 3px Stratosphere Blue line with right arrow from the left purple handle of this textbox to the previous textbox. Select the textbox. From the Motion > Object Animations, click + Add animation, then choose Fly in from top and After Previous.
- Double-click in the fourth box to highlight the text cursor. Cntrl or ⌘k to activate the hyperlink feature. From the dropdown menu, choose the How Online Advertising Works slide. Click Apply. Connect a 3px Stratosphere Blue line with right arrow from the left purple handle of this textbox to the previous textbox. Select the textbox. From the Motion > Object Animations, click + Add animation, then choose Fly in from right and After Previous.
- Double-click in the left box under the fourth slide to highlight the text cursor. Cntrl or ⌘k to activate the hyperlink feature. From the dropdown menu, choose the Who Profits from Online Advertising slide. Click Apply. Connect a 3px Stratosphere Blue line from the top purple handle of this textbox to the bottom of the fourth textbox. Apply a bottom arrow. Select the textbox. From the Motion > Object Animations, click + Add animation, then choose Fly in from right and After Previous.
- Double-click in the right box under the fourth slide to highlight the text cursor. Cntrl or ⌘k to activate the hyperlink feature. From the dropdown menu, choose the Truth in Advertising Laws slide. Click Apply. Connect a 3px Stratosphere Blue line from the top purple handle of this textbox to the bottom of the fourth textbox. Apply a bottom arrow. Select the textbox. From the Motion > Object Animations, click + Add animation, then choose Fly in from bottom and After Previous.
- Double-click in the last box under the first slide to highlight the text cursor. Cntrl or ⌘k to activate the hyperlink feature. From the dropdown menu, choose the How Humanoid Robots are Evolving slide. Click Apply. Select the textbox. From the Motion > Object Animations pane, click + Add animation, then choose Fade in and After Previous.
4.6 Ask for help.
Stuck on a specific step? Share your file with the instructor.
In order for the instructor and TAs to see your progress without having to download or ask for account permission, provide a correctly-set sharing URL so they can look at it live. Follow the most appropriate instructions below.
Paste the sharing URL into the Canvas Inbox message or Assignment Comment box, along with your questions. Note which step number you're stuck on.
Share Microsoft Office files from the OSU OneDrive cloud drive and share Google Suite files from the OSU Google cloud drive:
- Windows or Microsoft Account
- Login to your OSU OneDrive account from the browser.
- Drag the file from your hard drive to the OSU OneDrive file list in the browser to transfer it there.
- Beside the file name in the list, click the
 Share icon:
- Choose the settings provided in the screenshot below:
- Copy the link so you can provide it to the instructor or in the Assignment Comment box.
- Google Account
- With your file open, click the Sharing button at the top right of the screen. Or, if the file is not open but listed in the Drive, right-click it to choose the Share menu.
- Click the Get Link box to update the OSU Settings and copy the link:

- Ignore the Share with People and Groups box for this course.

Paste the URL into the Canvas Inbox message or Assignment Comment box, along with your questions. Note which step number you're stuck on.
4.7 Verify your work.
From the Canvas Home tab, click the Ch 4 ~ How data collection works assignment. Scroll to the bottom to see the Rubric. Compare your work to the Rubric to ensure you've included all paragraphs and materials. The rubric is based on the following scoring criteria, which are based on the instructions above: Check off each criterion to confirm you've completed them before submitting the file.
- Presentation was submitted as a PDF file and as a published/shared URL.
- Extra Credit voice-over video recording sharing URL is provided.
- Presentation is free of plagiarism.
- Presentation slide size displays in a 16:9 ratio (10 by 5.63 inches).
- Presentation slides transition from the right.
- Presentation cover has a Beaver Orange background with white Roboto headings and the OSU logo.
- Presentation cover slide includes the title and student's first and last name.
- Presentation text slides have a consistent heading size of 28pt in Beaver Orange and text size of 18pt with a 1.5 line spacing with bullets or indents in Stratesphere Blue.
- Presentation text slides have narrow margins on all four sides.
- Presentation text slides have a consistant font size 18pt and 1.5 line-height without bullets or indents.
- Presentation slide 2 summarizes and cites how search works. Key concepts are bolded.
- Presentation slide 3 summarizes and cites how online advertising works. Key concepts are bolded.
- Presentation slide 4 summarizes and cites truth in advertising laws. Key concepts are bolded.
- Presentation slide 5 summarizes and cites who profits from advertising. Key concepts are bolded.
- Presentation slide 6 summarizes and cites how data mining works. Key concepts are bolded.
- Presentation slide 7 summarizes and cites the dark side of AI chatbots. Key concepts are bolded.
- Presentation slide 8 includes a humanoid-related YouTube video, stretched to fit.
- Presentation slide 9 includes a formal, numbered bibliography of 7 or more sources.
- Presentation is free of spelling and grammar errors.
- Presentation text slides have Beaver Orange hyperlinks.
4.8 Submit the file and URL.
Each assignment must be submitted before the Due date and time as specified on the Canvas Home tab. The Available Until date and time constitutes a grace period, which can be used in an emergency, or if you are ill (it cannot be used for every assignment). Students who submit using the Available Until date may incur score reduction. Students on a DAS Flexibility Contract: there is no need to notify the instructor. All of your Available Until dates will be set to 72 hours past the Due Date, which can be used up to 3 times. Abuse of the Flexibility Contract will be reported to DAS.
- Click on the Canvas Home button and scroll down to the chapter assignment. Click the assignment link.
- Upload the PDF file. Confirm that it uploaded.
- Paste the published/sharing URL of your slideshow presentation into the Commenting box.

- Extra Credit: paste in the sharing URL of your Video Recording.
- Check the TurnItIn Report for plagiarized phrases and sentences. Review how to use TurnItIn. Edit or add quote marks in your original file to ensure the second draft of the file will pass the TurnItIn inspection. Resave the PDF file. Upload the newer version in the assignment's Submission Details screen.
- Within 3 days of submission, be on the lookout for Rubric feedback and Comments from the TA and Instructor.
- Ask questions about the score and feedback in the assignment's Commenting box.