Chapter 11 ~ Extra Credit: Screencasting
⬆ Shiftrefresh Shift-Refresh this page to see the most up-to-date instructions.
To earn up to 12 points of extra credit as well as help future students, record a screencast (in your native language) of you teaching one of the lessons in this textbook.
Students who find that they are coordinated enough to talk and compute at the same time (dare I say talented enough) should put the skill of screencasting on their résumés!
Teach a lesson (12 points)
11.1. Choose a lesson to teach.
Which lesson was easiest for you? Or which one did you struggle with but managed anyway? Think about technical skills you learned during the course and pick one set of blue, numbered procedural steps from chapters 1 through 10 to record. Pick a skill that does not already have a video provided for your platform. Record in English, or your native language, then update the captions/subtitles to use proper English.
The recording of a computer screen while following procedures is called a screencast, the result of which is a video with sound that can be shared via YouTube or embedded in web pages and email messages. Most platforms have some form of built-in screen-capturing function, but other applications make this task easier as well as provide trimming, cropping, labeling, captioning, and various output options.
If your resulting screencast is well produced, it will be added to this textbook (with your permission).
- Once you pick the lesson to teach, set up your screen so that only the lesson instructions and your resulting file are visible on the screen.
For example:

- Zoom in with Ctrl+ or ⌘+ so that menus, functions, and panes are larger.
- Read the steps to practice (but don't read it for your final recording). Do you find it difficult to read and do the tasks at the same time, or do you find it simple enough?
- Practice doing the procedure a few times to get comfortable.
- The four most important qualities of your recording are:
- They follow this textbook's instructions. The goal is to supplement one set of blue-headlined textbook steps.
- Sufficient volume and tone: a quiet and/or gravelly voice is irritating. Speak clearly.
- Sufficient size: all elements you point to on the screen must be legible. Use the 1920x1080 or smaller screen size. Don't use an entire Retina display screen; it is too big.
- Sufficient time: Keep the lesson short...under 1 minute is preferable and no more than 2 minutes.
- While recording, state your name and the name of the lesson.
- State the chapter number, step number, and title of the lesson (blue heading).
- State which platform (Mac, Windows, Chromebook, or Linux) and application you are using for this demonstration.
- Show how to do each step with your mouse and keyboard while you describe it with your voice. Do not read the textbook...tell viewers what to do in your own words.
- Feel free to use the other screen tools, if any.
- Mention recommendations as needed (as long as they do not stray from the existing instructions).
Read the 24 Tips for Creating High Quality Screencasts article to ensure you are ready.
11.2 Setup and Record.
-

- Launch Chrome browser.
- Navigate to Screencastify.
If prompted to purchase, go to the
Pricing page to choose the $0 free option.
- Click the Add to Chrome button.
Allow all permissions.


- Click the Screencastify arrow
 next to the address bar in the Chrome browser Extension bar.
 - Log in with your OSU Google account so you can save the file on your Google Drive. (You'll add it to your OSU YouTube account later.)
- Click the
Screencastify Chrome Extension next to the address bar.
- The default settings are fine. Don't turn on the webcam.
- If the microphone doesn't work, try plugging in a set of earphones.
- Click the Record button to record as practiced.
- Pause and stop the recording as needed to complete the cast.
- Save the recording to your OSU Google Drive. (You'll add it to YouTube later.)

- Launch the Zoom app and log in with your OSU ONID account.
- Click Schedule a Meeting.
- In the Topic field, add the number and name of the lesson.
- Click Save.
- Click Start this Meeting.
- Click the green Share button then the Advanced Tab.
Choose the Portion of the Screen option.


- Adjust the green screen border to include your two windows (as per step 11.1.1 above).
- Click the 3-dot More menu to choose Record to the Cloud.

- To stop recording, use the Stop Recording option under the 3-dot More menu.

- From the Zoom app, click the Recordings tab to view your recording in a list.
- After the video has completed processing, (which may take a while), move onto the next step.

- Launch QuickTime on MacOS. (To use QuickTime on Windows, first install the app).
- Cancel the popup requesting to open a file, and from the File menu, choose New Screen Recording
- Click the Capture button on the popup toolbar.
- To stop the recording, click on the stop ▀ button in the Toolbar at the very top right of your screen.
- Click the close window box to name the file and save it to your hard drive.
An alternative to using Mac QuickTime is the Capture utility. Learn more...
11.3. Review your work.
- Listen to your recording to confirm it captured all the necessary steps, was loud and clear, and each menu item you selected was visible.
- Redo the cast as often as needed to meet these requirements noted in the Criteria at the bottom of this chapter.
- Trim or crop the recording to improve legibility, if necessary.

- Rename the screencast file with the step number, step title, your last name, and your first name, like this: 1.2-learn-about-canvas-menu-vanlonden-pam. Use lowercase letters and hyphens instead of uppercase and spaces (an HTML standard for file names).
- Save the file to your Google Drive. Note, however, that YouTube is required for the submission...keep reading.
11.4. Share the file with YouTube.
-
- From Screencastify, select the screencast from your list of casts.
- Click the icon on the toolbar.
- Share the file with your OSU YouTube account.

-
- The Zoom recording should have saved in your Zoom app list of Recordings.
- Click the Share button to update settings and copy the sharing URL.

- Select the URL and paste it into a browser tab.
- Click the Download button to save the file to your hard drive.
- Locate the file on your hard drive so it is ready for the next step.
-
- From the File > Share menu, choose YouTube.
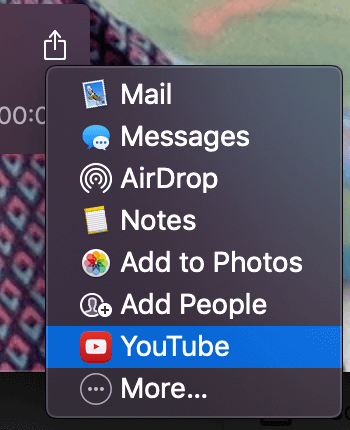
- Log in to your OSU YouTube account.
- If that didn't work, then locate the file on your hard drive so it is ready for the next step.
- From the File > Share menu, choose YouTube.
11.5 Upload to YouTube and edit captioning.
- Navigate to YouTube Studio.
- Log in using your OSU Google userID and password.
- Click the Videos menu to view the list of uploaded videos.

- If you've never used the Studio with your OSU account, the list will be empty.
- If you completed the video lesson from Chapter 1, then that recording will be listed here.
- If you used QuickTime to generate the video, then look to see if it is listed here. If not, move onto the next step.
- Click the Create > Upload button to locate your movie/video file on your hard drive.

- Fill in the title, description, restrictions, visibility, and choose a thumbnail image from the list of options.
Set the visibility to Unlisted, so we can view it (it won't be searchable).

Set the visibility to Unlisted

- Finish filling in the screens while the video renders.
- Click the subtitlesSubtitles icon on the left sidebar.
- Click the Duplicate and Edit button for the English language listed at the top.
- Edit the text provided to improve:
- Spelling.
- Capitalization.
- Punctuation.
- Click the Publish button.
11.6 Verify your work.
- Cast starts with student's name.
- Cast states the chapter, step number, and name of the lesson.
- Cast states the platform and software used for the lesson.
- Content of the recording correlates with the textbook lesson.
- Textbook instructions are on the left one-third of the screen.
- Working file is on the right two-thirds of the screen.
- Volume of the voice is loud and clear.
- Dimensions of the cast are 1920px by 1080px or smaller.
- Mouse actions are legible.
- Cast does not have wasted space at the beginning or end.
- Cast is under 2 minutes.
- Automatic subtitles/closed-captioning was edited for proper grammar and punctuation.
11.7 Submit the sharing URL.
Each assignment must be submitted before the Due date and time as specified on the Canvas Home tab. The Available Until date and time constitutes a grace period, which can be used in an emergency, or if you are ill (it cannot be used for every assignment). Students who submit using the Available Until date may incur score reduction. Students on a DAS Flexibility Contract: there is no need to notify the instructor. All of your Available Until dates will be set to 72 hours past the Due Date, which can be used up to 3 times. Abuse of the Flexibility Contract will be reported to DAS.
- From YouTube, copy the sharing URL provided in the Editing area or from the viewing area.
- Click on the Canvas Home button and scroll down to the Ch 11 ~ Extra Credit Screencasting assignment. Click the assignment link.
- Paste the sharing URL of your YouTube video in the Commenting box.
- Within 3 days of submission, be on the lookout for Rubric feedback and Comments from the TA and Instructor.
- Ask questions about the score and feedback in the assignment's Commenting box.